$33.95
Ammann AFW 150-2 Asphalt Paver, Wheeled Operating Manual 3001389 PDF
Ammann AFW 150-2 Asphalt Paver, Wheeled Hatz 1B40T Operating Manual 3001389 – PDF DOWNLOAD
FILE DETAILS:
Ammann AFW 150-2 Asphalt Paver, Wheeled Hatz 1B40T Operating Manual 3001389 – PDF DOWNLOAD
Language : English
Pages : 202
Downloadable : Yes
File Type : PDF
IMAGES PREVIEW OF THE MANUAL:
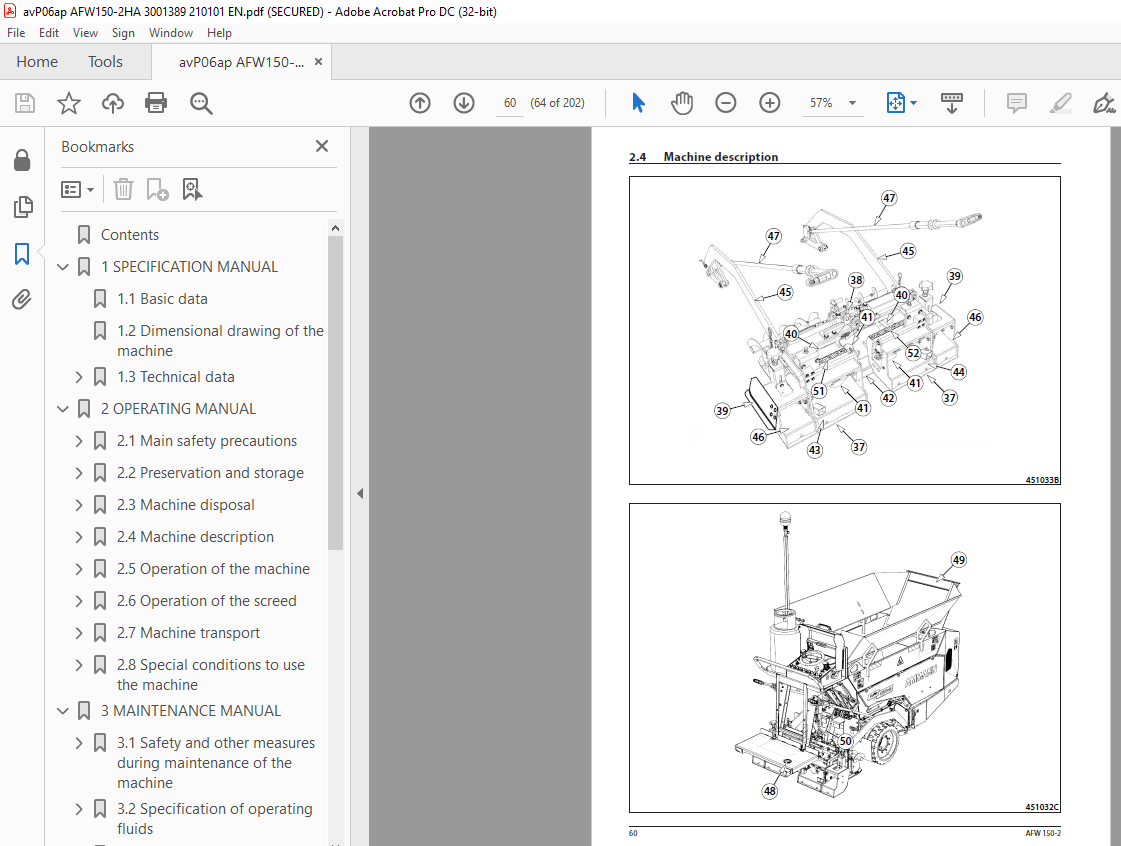
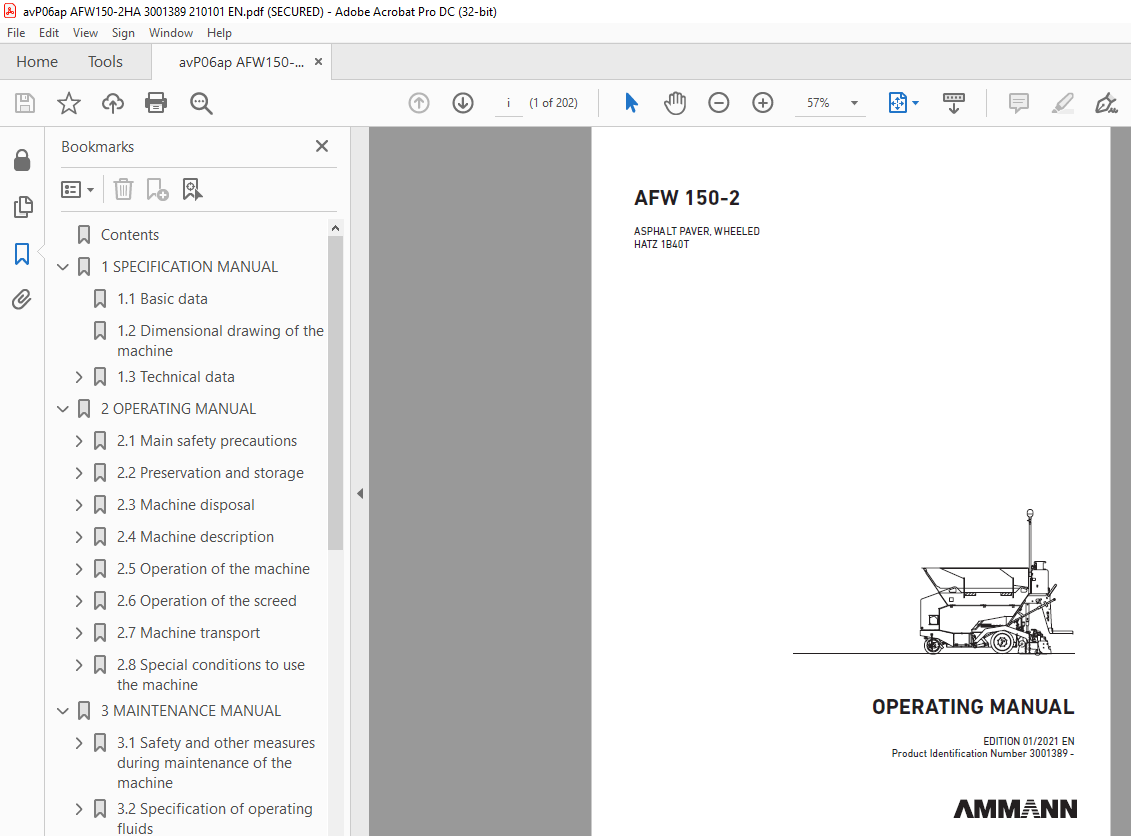
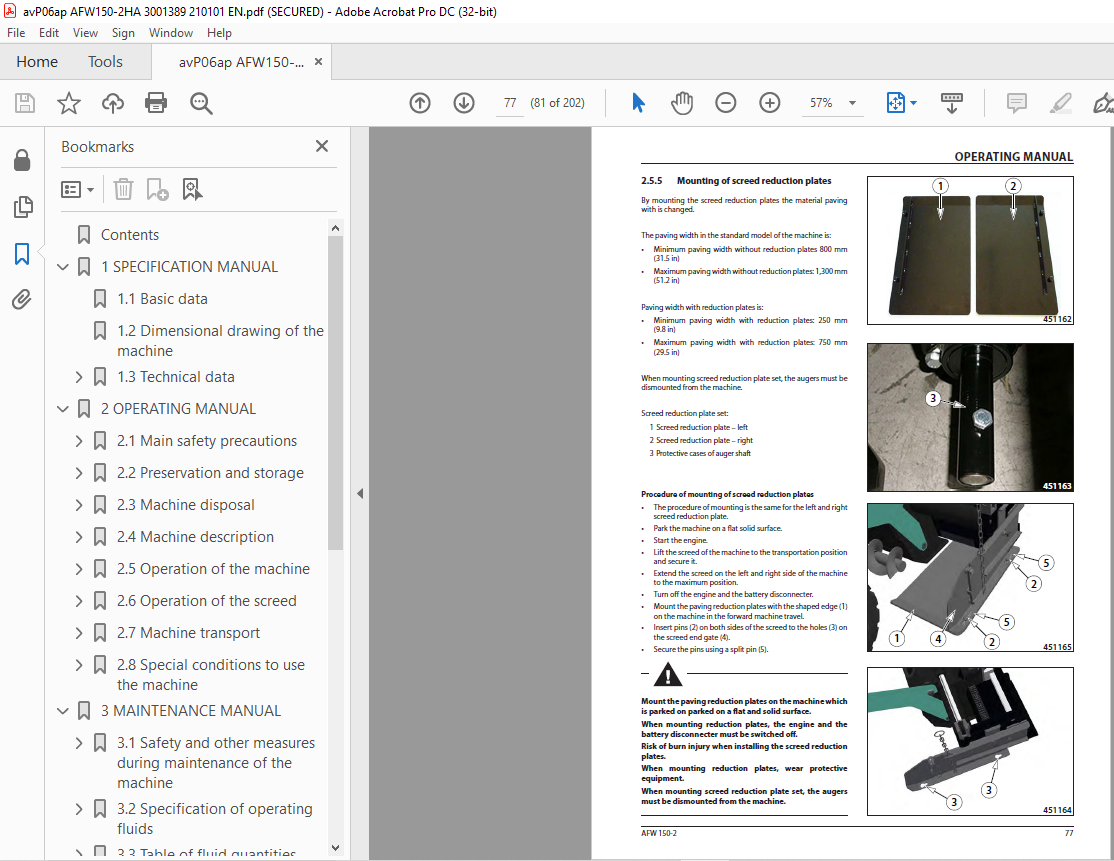
TABLE OF CONTENTS:
Ammann AFW 150-2 Asphalt Paver, Wheeled Hatz 1B40T Operating Manual 3001389 – PDF DOWNLOAD
Contents 8
1 SPECIFICATION MANUAL 13
1 1Basic data 14
1 2Dimensional drawing of the machine 16
1 3Technical data 18
1 3 1Specification table 18
1 3 2Machine gradeability and lateral static stability 20
1 3 3Optional equipment 22
1 3 3 1Screed vibration units 23
1 3 3 2Mechanical screed extension 24
1 3 3 3Dual wheels 26
1 3 3 4Front wheel scraper 27
1 3 3 5Material hopper extension 28
1 3 3 6Additional lighting 29
1 3 3 7Screed copying system 30
2 OPERATING MANUAL 33
2 1Main safety precautions 34
2 1 1Obligations before putting into operation 34
2 1 2Assurance of safety precautions by the owner 34
2 1 3Requirements for qualified personnel 35
2 1 4Machine operator’s obligations 36
2 1 5Screed operators’ obligations 37
2 1 6Driver’s stand and screed operator stand during machine operation 38
2 1 7Dangerous zone and safe distance 39
2 1 8Machine operation at unclear working areas 42
2 1 9Manual signals 42
2 1 10Safety notices and symbols used on the machine 46
2 1 11Personal protective equipment 49
2 1 12General safety precautions 50
2 1 13Safety precautions during machine operation 50
2 1 14Safety and fire precautions during the use of gas bottles 51
2 1 15Safety precautions for the use of portable fire extinguisher 52
2 1 16Safety and fire precautions during welding on the machine 52
2 1 17Safety precautions for electrical and electronic equipment of the machine 53
2 1 18Prohibited activities 54
2 2Preservation and storage 56
2 2 1Storage places and storage conditions 56
2 2 2Preservation and storage of the machine for 1–2 months 57
2 2 3Preservation and storage of the machine for a period over 2 months 58
2 2 4Removing chemical preservatives and putting the machine into operation 59
2 3Machine disposal 61
2 3 1Machine disposal after its service life 61
2 4Machine description 62
2 4 1Description of main parts of the machine and screed 63
2 4 2Main dashboard 66
2 4 3Display 70
2 4 4 Foot switch 72
2 5Operation of the machine 74
2 5 1Turning ON/OFF the battery disconnecter 74
2 5 2Basic equipment of the machine 75
2 5 3Machine footboard 78
2 5 4Deposition boxes and safety covers on the machine 79
2 5 5Mounting of screed reduction plates 81
2 5 6Beacon 83
2 5 7Driver’s stand 84
2 5 8Starting the engine 85
2 5 9Starting the engine using starting leads from external power supply 86
2 5 10Travel and reversing of the machine 87
2 5 11Stopping the machine and engine 89
2 5 12Machine parking 90
2 5 13Front wheel 91
2 5 14Using and setting the paving direction indicator 92
2 5 15Hopper 93
2 5 16Material outlet 94
2 5 17Conveyor 95
2 5 18Conveyor limit switch 96
2 5 19Augers 97
2 6Operation of the screed 98
2 6 1Lifting and lowering the screed 98
2 6 2Screed lock 99
2 6 3Setting the paving width 100
2 6 4Setting the paving thickness 102
2 6 5Setting the roadway profile 103
2 6 6Setting the end gates 104
2 6 7Screed vibration (optional equipment) 105
2 6 8Screed gas heating 106
2 6 9Loading material to the machine 112
2 6 10Start of paving 113
2 6 11End of paving 114
2 7Machine transport 115
2 7 1Preparation of the machine for transport 115
2 7 2Loading the machine using a ramp 116
2 7 3Loading the machine with a crane 117
2 7 4Machine transport 118
2 7 5Preparation of the machine for operation after transportation 118
2 8Special conditions to use the machine 119
2 8 1Towing the machine 119
2 8 2Climatic conditions 120
2 8 3Operation of the machine in dusty environment 120
3 MAINTENANCE MANUAL 123
3 1Safety and other measures during maintenance of the machine 125
3 1 1Safety precautions during machine maintenance 125
3 1 2Safety and fire precautions during replacement of operating fluids 126
3 1 3Environmental and hygienic principles 127
3 1 3 1Hygienic principles 127
3 1 3 2Environmental principles 127
3 2Specification of operating fluids 128
3 2 1Engine oil 128
3 2 2Fuel 128
3 2 3Hydraulic oil 129
3 2 4Anti-adherent solution 129
3 2 5Liquid gas 130
3 2 6Lubricating grease 130
3 3Table of fluid quantities 131
3 3 1Overview of fluids quantities and overview of symbols specified in maintenance plans 131
3 4Lubrication and maintenance chart 132
3 5Lubrication and service plan 134
3 5 1Maintenance plan 134
3 6Lubrication and maintenance operations 135
Every 10 hours at the beginning of work (daily) 136
3 6 1Fuel level check 136
3 6 2Engine oil check 137
3 6 3Hydraulic oil check in the hydraulic tank 138
3 6 4Driver’s stand cleaning 139
3 6 5Cleaning the hopper, outlets and conveyor 140
3 6 6Auger cleaning 141
3 6 7Test of burner ignition, flame position adjustment and spark plug maintenance 142
3 6 8Gas equipment tightness check 146
3 6 9Brake test 147
3 6 9 1Check of the parking brake 147
3 6 9 2Check of the emergency brake 148
3 6 9 3Check of the service brake 149
3 6 10Check of the tightness of the fuel and hydraulic system 150
Every 10 hours at the end of work (daily) 151
3 6 11Fuel level check 151
3 6 12Cleaning the hopper, outlets and conveyor 152
3 6 13Auger cleaning 153
Every 50 hours (week) 154
3 6 14Cleaning the water separator 154
3 6 15Machine lubrication 155
Every 100 hours of operation (monthly) 158
3 6 16Fuel system tightness check 158
3 6 17Rear wheel fastening check 159
3 6 18Conveyor chain tensioning 160
Every 250 hours of operation (every 3 months) 161
3 6 19Engine oil replacement 161
3 6 20Engine air intake check 162
3 6 21Engine accelerator cable tension check 163
3 6 22Hydraulic oil cooler cleaning 164
3 6 23Hydraulic circuit tightness check 165
3 6 24Battery check 166
3 6 25Checking the conveyor drive chain tension 168
Every 500 hours of operation (every 6 months) but at least once a year 169
3 6 26Fuel filter replacement 169
3 6 27Air filter replacement 171
3 6 28Front and rear wheel condition check 172
Every 1000 hours (yearly) 173
3 6 29Engine oil filter cleaning 173
3 6 30Hydraulic oil and hydraulic oil filter replacement 175
3 6 31Gas line hose replacement 177
Maintenance as required 178
3 6 32Battery replacement 178
3 6 33Charging of the battery 179
3 6 34Screw connections tightness check 180
3 7Troubleshooting 182
3 7 1Troubleshooting 182
3 7 2Troubleshooting engine faults when indicator lamps are lit on the display 182
3 7 3Troubleshooting the hydraulic system 182
3 7 4Troubleshooting the electrical system 183
3 7 5Troubleshooting of screed heating when active error indicator lamp is lit and an error code is shown on the display 184
3 7 6List of error codes displayed on the display 185
3 8Appendices 188
3 8 1Machine wiring diagram 188
3 8 2Machine hydraulic system diagram 194
3 8 2 1Measuring points of the hydraulic circuit 196
3 8 3Screed gas heating system diagram 197
3 8 4Table of spare parts for regular maintenance 198
3 8 5Content of the filter set after 500 hours (4-760224) 199
3 8 6Content of the filter set after 1000 hours (4-760225) 199
More products