$35.95
Gem Realpiano Grp 800 Service Manual – DOWNLOAD
Gem Realpiano Grp 800 Service Manual – DOWNLOAD
FILE FORMAT:
Gem Realpiano Grp 800 Service Manual – DOWNLOAD
LANGUAGE:ENGLISH
PAGES:12
DOWNLOADABLE:YES
FILE TYPE:PDF
IMAGES PREVIEW OF THE MANUAL:


DESCRIPTION:
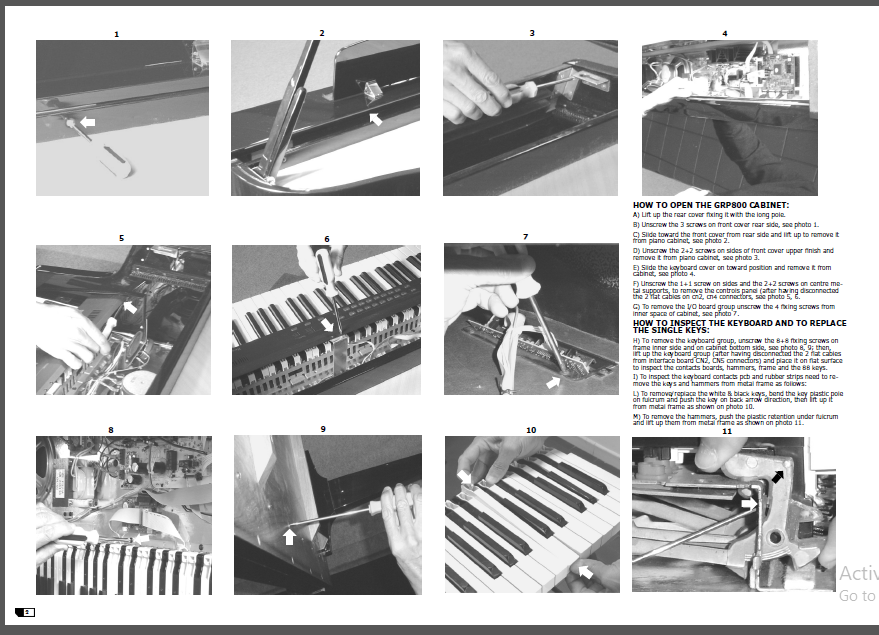
A) Lift up the rear cover fi xing it with the long pole.
B) Unscrew the 3 screws on front cover rear side, see photo 1.
C) Slide toward the front cover from rear side and lift up to remove it from piano cabinet, see photo 2.
D) Unscrew the 2+2 screws on sides of front cover upper fi nish and remove it from piano cabinet, see photo 3.
E) Slide the keyboard cover on toward position and remove it from cabinet, see photo 4.
F) Unscrew the 1+1 screw on sides and the 2+2 screws on centre metal supports, to remove the controls panel (after having disconnected the 2 fl at cables on cn2, cn4 connectors, see photo 5, 6.
G) To remove the I/O board group unscrew the 4 fi xing screws from inner space of cabinet, see photo 7.
HOW TO INSPECT THE KEYBOARD AND TO REPLACE THE SINGLE KEYS:
H) To remove the keyboard group, unscrew the 8+8 fi xing screws on frame inner side and on cabinet bottom side, see photo 8, 9; then, lift up the keyboard group (after having disconnected the 2 fl at cables from interface board CN2, CN5 connectors) and place it on fl at surface to inspect the contacts boards, hammers, frame and the 88 keys.
I) To inspect the keyboard contacts pcb and rubber strips need to remove the keys and hammers from metal frame as follows:
L) To remove/replace the white & black keys, bend the key plastic pole on fulcrum and push the key on back arrow direction, then lift up it from metal frame as shown on photo 10.
M) To remove the hammers, push the plastic retention under fulcrum and lift up them from metal frame as shown on photo 11.
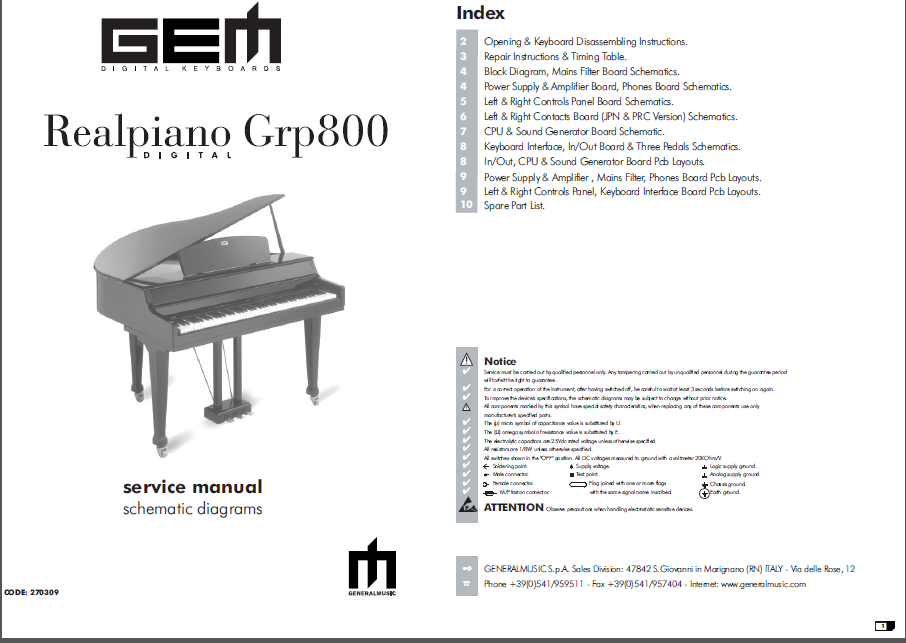
TABLE OF CONTENTS:
- Opening & Keyboard Disassembling Instructions.
- Repair lnstructions & Timing Table.
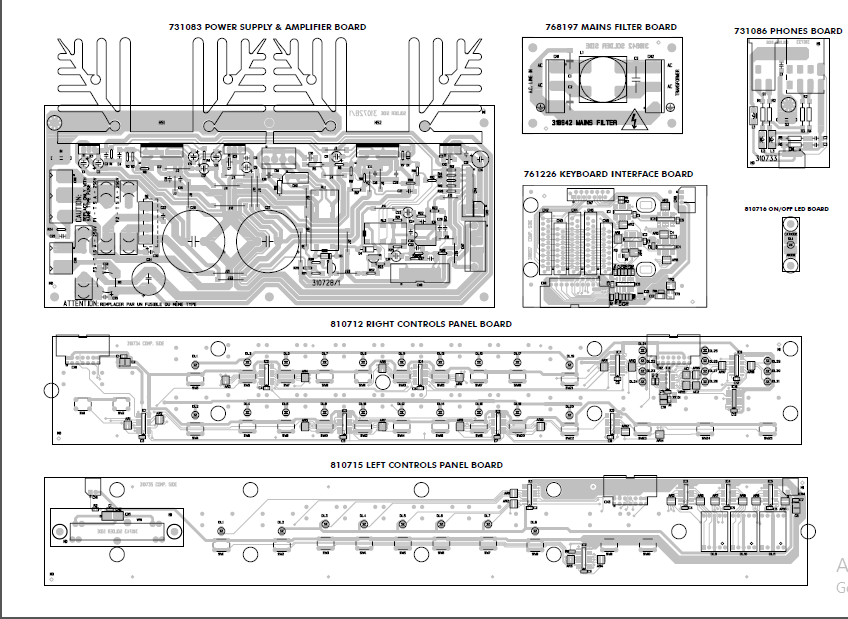
- Block Diagram, Mains Filter Board Schematics.
- Power Supply & Amplifier Board, Phones Board Schematics.
- Left & Right Controls Panel Board Schematics.
- Left & Right Contacts Board (JPN & PRC Version) Schematics.
- CPU & Sound Generator Board Schematic
- Keyboard Interface, ln/Out Board & Three Pedals Schematics.
- In/Out, CPU & Sound Generator Board Pcb Layouts.
- Power Supply & Amplifier , Mains Filter, Phones Board Pcb Layouts.
- Left & Right Controls Panel, Keyboard Interface Board Pcb Layouts.
- Spore Port List.
More products