$32
Gleaner EU 4300 Pickup Header Operator’s Manual – PDF DOWNLOAD
Gleaner EU 4300 Pickup Header Operator’s Manual – PDF DOWNLOAD
FILE DETAILS:
Gleaner EU 4300 Pickup Header Operator’s Manual – PDF DOWNLOAD
Language : English
Pages : 166
Downloadable : Yes
File Type : PDF
Size: 21.7 MB
IMAGES PREVIEW OF THE MANUAL:

DESCRIPTION:
Gleaner EU 4300 Pickup Header Operator’s Manual – PDF DOWNLOAD
A word to the operator:
- It is your responsibility to read and understand the safety section in this manual and the manual for all implements before you operate this machine. You are responsible for your safety. Good safety procedures prevent injury to you and the persons around you.
- Make the information in the safety section of this manual a part of your safety procedure. This safety section is written only for this type of machine. Safety is your responsibility. You can prevent injury and death.
- This safety section gives basic safety examples that can occur during the operation and maintenance of your machine. This safety section is not a replacement for safety instruction in other sections of this manual.
- Injury or death can occur if the safety instruction is not obeyed. Learn how to operate the machine and how to use the controls correctly. Do not operate the machine if you do not know how to operate the machine. Do not let persons operate the machine that do not know how to operate the machine.
- Follow all safety instructions in the manuals and on the safety signs on the machine, the implements, and the attachments.
- Use only approved attachments and implements.
- Make sure that your machine has the correct equipment that is necessary by the local regulations.
This manual:
- This manual covers general safety practices for this machine. The operator manual must always be kept
with the machine. - Right-hand and left-hand, as used in this manual, are determined by facing the direction the machine will
travel when in use. - The photos, illustrations, and data used in this manual were current at the time of printing, but due to
possible in-line production changes, your machine can vary slightly in detail. The manufacturer reserves the
right to redesign and change the machine as necessary without notification.
Operation:
Prepare for operation:
- Read and understand all operating instructions and precautions in this manual before operating or servicing
the machine. - Make sure you know and understand the positions and operations of all controls. Make certain all controls
are in neutral and the park brake is applied before starting the machine. Make sure the steering wheel is
centered and locked. - Make certain all people are well away from your area of work before starting and operating the machine.
Check and learn all controls in an area clear of people and obstacles before starting your work. Be aware of
the machine size and have enough space available to allow for operation. Never operate the machine at
high speeds in crowded places. - Emphasize the importance of using correct procedures when working around and operating the machine.
Do not let children or unqualified persons operate the machine. Keep others, especially children, away from
your area of work. Do not permit others to ride on the machine. - Make sure the machine is in the proper operating condition as stated in the Operator Manual. Make sure
the machine has the correct equipment required by local regulations. - All equipment has a limit. Make sure you understand the speed, brakes, steering, stability, and load
characteristics of this equipment before you start.
TABLE OF CONTENTS:
Gleaner EU 4300 Pickup Header Operator’s Manual – PDF DOWNLOAD
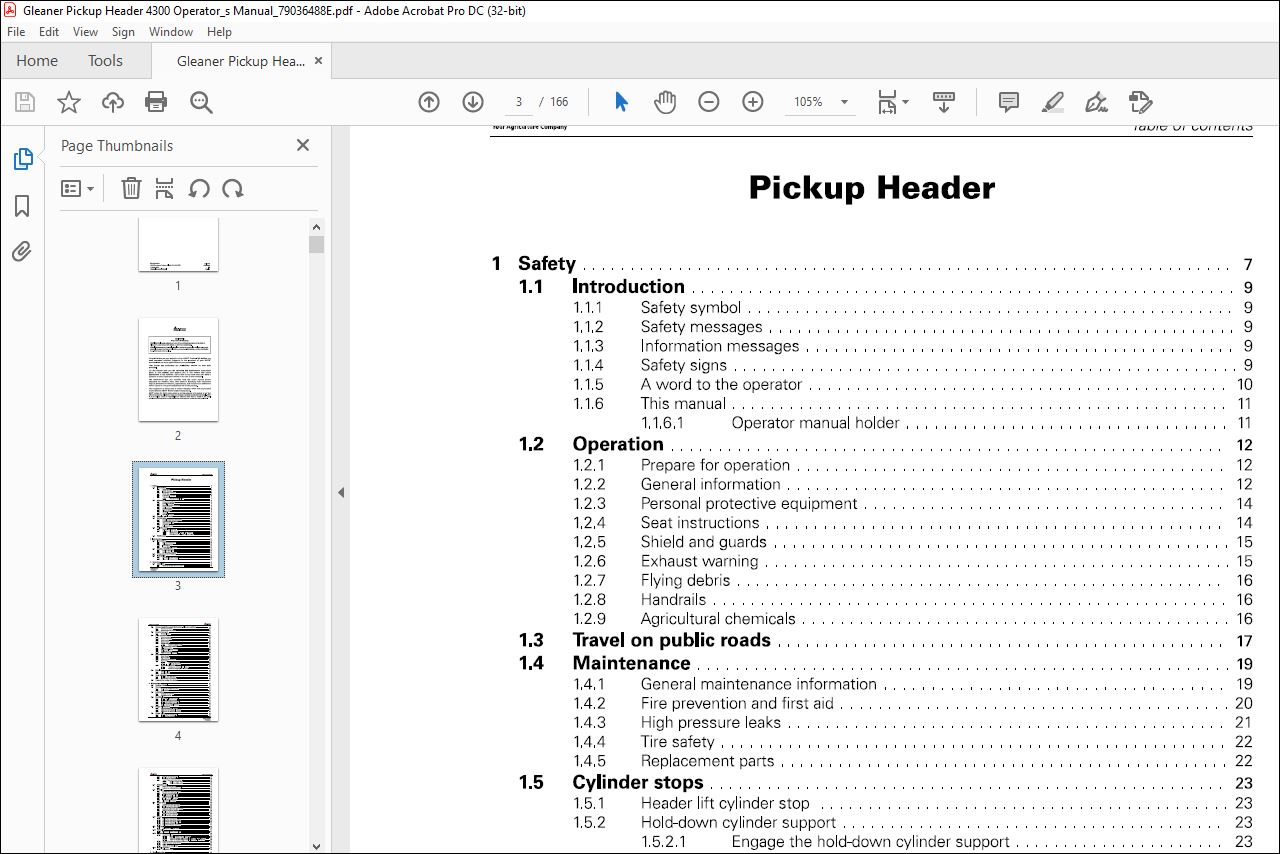
1 Safety 7
1 1 Introduction 9
1 1 1 Safety symbol 9
1 1 2 Safety messages 9
1 1 3 Information messages 9
1 1 4 Safety signs 9
1 1 5 A word to the operator 10
1 1 6 This manual 11
1 1 6 1 Operator manual holder 11
1 2 Operation 12
1 2 1 Prepare for operation 12
1 2 2 General information 12
1 2 3 Personal protective equipment 14
1 2 4 Seat instructions 14
1 2 5 Shield and guards 15
1 2 6 Exhaust warning 15
1 2 7 Flying debris 16
1 2 8 Handrails 16
1 2 9 Agricultural chemicals 16
1 3 Travel on public roads 17
1 4 Maintenance 19
1 4 1 General maintenance information 19
1 4 2 Fire prevention and first aid 20
1 4 3 High pressure leaks 21
1 4 4 Tire safety 22
1 4 5 Replacement parts 22
1 5 Cylinder stops 23
1 5 1 Header lift cylinder stop 23
1 5 2 Hold-down cylinder support 23
1 5 2 1 Engage the hold-down cylinder support 23
1 5 2 2 Disengage the hold-down cylinder support 23
1 6 Safety signs 25
2 Introduction 31
2 1 Introduction 33
2 1 1 Units of measurement 33
2 1 2 Replacement parts 33
2 1 3 Intended use 33
2 1 4 Proper disposal of waste 33
2 2 Machine identification 34
2 2 1 Serial number plate 34
2 2 2 Serial number description 34
2 3 Component identification 36
2 4 End shields 38
2 4 1 Open the left side end shield 38
2 4 2 Close the left side end shield 38
3 Operation 41
3 1 Checklists 43
3 1 1 Check the machine before operation 43
Pickup Header
79036488E
Table of contents , •AGCO
Your Agriculture Company
3 2 Connect and disconnect the header – Gleaner combine 44
3 2 1 Connect the header 44
3 2 2 Disconnecting the header 47
3 3 Header transport 49
3 3 1 Transport lamps 49
3 4 Field operation 50
3 4 1 Stop the machine 50
3 4 2 Break in the header 50
3 4 3 Draper speed 51
3 4 4 Header height 52
3 4 5 Pickup height 52
3 4 5 1 Adjust the pickup height 53
3 4 6 Adjust the header floatation 53
3 4 7 Hold-down position 56
3 4 8 Adjust the hold-down rod angle 56
3 4 9 Unplug the header 57
3 4 10 Adjust the pan seal assembly 57
3 5 Auger 59
3 5 1 Auger speed 59
3 5 2 Auger position 59
3 5 3 Adjust the auger position 59
3 5 4 Auger float 60
3 5 4 1 Lock the auger float 60
3 5 4 2 Unlock the auger float 61
3 5 5 Stripper plate clearance 62
3 5 5 1 Examine the stripper plate clearance 62
3 5 5 2 Adjust the stripper plate clearance 63
3 6 Driveline 64
3 6 1 Driveline clutch 64
3 6 2 Driveline guard 64
3 7 Crop deflectors 65
3 7 1 Install the crop deflectors 65
3 7 2 Remove the crop deflectors 66
3 8 Prepare the header for storage 67
4 Maintenance 69
4 1 Service Schedule 71
4 2 Service 72
4 2 1 Prepare the header for service 72
4 2 2 Yearly service 72
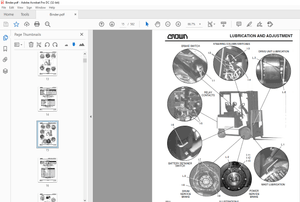
4 3 Lubrication 73
4 3 1 Lubricate the machine 73
4 3 2 Lubrication points 74
4 4 End shields 75
4 4 1 Remove the left side end shield 75
4 4 2 Install the left side end shield 76
4 4 3 Remove the right side end shield 77
4 4 4 Install the right side end shield 78
4 4 5 Replace the end shield brackets 79
4 5 Draper belt tension 80
4 5 1 Check the draper belt tension 80
4 5 2 Adjust the front draper belt tension 81
4 5 3 Adjust the rear draper belt tension 82
4 6 Draper belts 84
4 6 1 Remove the front draper belt 84
4 6 2 Install the front draper belt 85
Pickup Header
79036488E
AGCO
Your Agriculture Company
4 7
4 8
4 9
4 10
4 11
4 12
4 13
4 14
4 6 3
4 6 4
4 6 5
Table of contents
Remove the rear draper belt 87
Install the rear draper belt 88
Draper fingers and draper guides 89
4 6 5 1 Replace a draper finger 89
4 6 5 2 Replace a draper guide 89
Cutterbar seal 91
4 7 1 Adjust the cutterbar seal 91
4 7 2 Remove the cutterbar rubber seal 91
Driveline 93
4 8 1 Lubricate the header drive shaft 93
4 8 2 Remove the header driveline 93
4 8 3 Install the header driveline 94
4 8 4 Replace the drivel ine clutch 96
4 8 5 Remove the driveline guard 97
4 8 6 Install the driveline guard 99
4 8 7 Clean the splined shaft 100
Auger drive 102
4 9 1 Lubricate the auger drive chain 102
4 9 2 Remove the auger drive chain 102
4 9 3 Install the auger drive chain 103
4 9 4 Adjust the auger drive chain tension 104
4 9 5 Remove the driven sprocket 105
4 9 6 Install the driven sprocket 105
4 9 7 Remove the drive sprocket 109
4 9 8 Install the drive sprocket 110
Auger 112
4 10 1 Replace the auger fingers 112
4 10 2 Replace the auger finger guides 113
4 10 3 Replace the auger finger holders 114
4 10 4 Replace the stripper plates 117
4 10 5 Replace the fl ighting extensions 117
Hold down 119
4 11 1 Replace the hold-down rods 119
Hydraulic 121
4 12 1 Bleed the cylinders and the lines 121
Electrical 122
4 13 1 Height controllers 122
4 13 1 1 Manually examine the voltage range 122
4 13 1 2 Adjust the header height control voltage range – right-hand side 124
4 13 1 3 Adjust the header height control voltage range – left-hand side 125
4 13 2 Examine the draper speed sensor adjustment 126
4 13 3 Adjust the draper speed sensor 126
4 13 4 Lamps 127
4 13 5 Adjust the transport lamps 127
Wheels and tires 12a
4 14 1 Replace the wheels 128
5 Troubleshooting 131
5 1 Troubleshooting 133
6 Specifications 137
6 1 Specifications 139
6 1 1 Header specifications 139
6 1 2 Header dimensions 140
6 1 3 Lubrication specifications 141
Pickup Header
79036488E
Table of contents , •AGCO
Your Agriculture Company
7 Assembly 143
7 1 Preparing for assembly 145
7 1 1 Unloadtheheader 145
7 1 2 Lower the header 146
7 2 Assembly 148
7 2 1 Remove the transport hardware 148
7 2 2 Set the rigid wheels to the field position 149
7 2 3 Set the caster wheels to the field position 150
7 2 4 Install the crop deflectors 151
7 2 5 Install the driveline storage bracket 152
7 2 6 Adjust the transport lamps 153
7 2 7 Extend the hold down 154
7 2 8 Change the header opening 154
7 2 9 Reduce the header opening 155
7 2 10 Combine completion kits 158
7 3 Checklists 159
7 3 1 Pre-delivery checklist 159
7 3 2 Delivery checklist 159
8 Index 161
More products