$45
Heidenhain Inverter Systems and Motors Service Manual 2012 - PDF DOWNLOAD
Heidenhain Inverter Systems and Motors Service Manual 2012 - PDF DOWNLOAD
FILE DETAILS:
Heidenhain Inverter Systems and Motors Service Manual 2012 - PDF DOWNLOAD
Language :English
Pages :438
Downloadable : Yes
File Type : PDF
IMAGES PREVIEW OF THE MANUAL:
DESCRIPTION:
Heidenhain Inverter Systems and Motors Service Manual 2012 - PDF DOWNLOAD
1 How to use this service manual
1.1 Target group
This Service Manual has been written for specialist electricians for service, maintenance and
commissioning.
Specialists who perform work on the electrical system of a machine tool and its components must
have the required technical knowledge and competence
2 Safety precautions
2.1 Introduction
The safety precautions below are provided to ensure your personal safety and the safety of the machine tool. Please read this information carefully before you start servicing the machine!
TABLE OF CONTENTS:
Heidenhain Inverter Systems and Motors Service Manual 2012 - PDF DOWNLOAD
1 How to use this service manual 9
11 Target group 9
12 About this manual 9
Objective 9
Products described 9
Contents 9
Validity 9
Prerequisites 9
Update service 10
Print version 10
13 Other service manuals 10
14 Other documentation 10
15 Support 10
16 Service training 11
17 Meaning of the symbols used in this manual 11
18 Safety 11
2 Safety precautions 13
21 Introduction 13
22 Please observe 13
Ground 13
Zero potential 13
Fundamental knowledge 13
Know-how and competence 13
Suitable tools 14
Suitable voltage test unit 14
Safety precautions of the machine manufacturer 14
Regulations for power installations and accident prevention 14
Vertical axes 14
Liability 14
23 With inverter systems, especially remember 15
24 With motors, especially remember 16
3 Errors and error messages 17
31 Introduction 17
Permanent and reproducible errors 17
Sporadic and non- reproducible errors 17
32 Overview of possible errors 18
33 Error messages on the monitor of the control 21
List of NC error messages 21
PLC error messages 21
34 Log of the control 22
4 Explanation of the LEDs 23
41 Introduction 23
Red LED SH 1 / STO A 23
Red LED SH 2 / STO B 23
42 Controller unit with integrated inverter 24
UEC 11x and UMC 11x 24
43 Compact inverters 25
UE 1xx 25
UE 2xx 25
UE 2xxB 26
UE 2xxD 26
UR 2xx, UR 2xx D 27
44 Power supply units 28
UV 120, UVR 120D, UVR 130D, UV 140, UVR 140D, UV 150, UVR 150, UVR 150D, UVR 160D, UVR 160DW UVR 170DW 28
UV 130 29
UV 130D 29
45 Power modules 30
UM 1xx 30
46 HEIDENHAIN interface boards for the SIMODRIVE system 30
461 Boards with ribbon cable connection for the PWM interface 30
462 Boards with D-sub connection for the PWM interface 30
5 Procedures and tips for error diagnosis in the field 31
51 Introduction 31
52 Sequence for finding errors in digital drives 31
Flowchart 32
53 Sequence for finding errors in the control loop 33
Possible effects of contaminated, loose, defective encoders 33
Flowchart 34
54 Error localization by process of interchange 35
Example for the interchange of power modules 35
55 Error localization by process of exclusion 36
Flowchart 36
56 Notes and tips for the field service 37
What is the cause of this error? 37
First steps 37
Visual inspection 37
Comparison with functioning machines or devices 38
DC-link conductor bars 38
Cables 38
Connectors and females 39
Terminals 39
Shielding and grounding 39
Sources of interference 39
Contamination 40
Temperature 40
Humidity 40
Checking the safety measures for the EMV 41
6 Error diagnosis on motors 47
61 Safety 47
62 Possible causes of error 47
63 Visual inspection 48
64 Inspection for ground fault 49
Required measuring devices 49
Isolation voltage 49
Procedure 49
Figure: Ground fault measuring 50
Flowchart 51
Corrective action 52
Heavily contaminated motors 52
65 Inspection for winding short circuit or interruption 53
Required measuring devices 53
Procedure 53
Figure: Measuring winding short circuits 53
Flowchart 54
Corrective action 55
66 Inspection of the motor encoder 56
Figure: Motor encoder in HEIDENHAIN motor 56
Exchanging the interface 56
Corrective action 57
Further analysis with PWM 9 58
Further analysis with PWT 18 62
Further analysis with the IK 215 63
Further analysis with the PWM 20 63
67 Inspection of the fan 64
Figure: Measuring the fan voltage 64
Corrective action 64
68 Inspection of the temperature sensor 65
KTY 84-130 value table 65
Procedure 65
Measurement on the D-sub connector of the motor encoder cable 65
Measurement at the signal socket of the motor 66
Measurement in the terminal box of the motor 66
Corrective action 66
69 Inspection of the motor brakes 67
Motor brake test 67
Trigger voltage 67
Ohmic measurement 67
Corrective action 68
610 Inspection for unbalance 69
Corrective action 69
7 Error diagnosis on the inverter system 71
71 Safety 71
72 Possible causes of error 71
73 Visual inspection 72
74 Criteria for water-cooled inverters 73
75 Error diagnosis on the UV, UVR power supply unit 75
751 Inspection for ground fault 75
Fast line fuses 75
Load switching 75
Potential dividers 75
Required measuring devices 75
Isolation voltage 75
Procedure 76
Figure: Ground fault measuring 76
Flowchart 77
Corrective action 78
Heavily contaminated inverters 78
752 Inspection for short circuit or interruption 79
Fast line fuses 79
Load switching 79
Required measuring devices 79
Diode measurement 79
Block diagram: Non-controlled bridge rectifier 80
Block diagram: Controlled bridge rectifier with IGBTs 80
Procedure 80
Figure: Diode measurement 80
Flowchart: Short circuit or interruption between +Uz and -Uz 81
What cannot be measured? 82
Corrective action 82
Heavily contaminated inverters 82
753 Checking the fuses 83
754 Checking the braking resistor switch in the UV 130 (D) 84
Diode measurement 84
Required measuring devices 84
Block diagram 84
Pin layout 85
Procedure 86
Figure: Measuring of braking resistor switch 86
Flowchart: Short circuit or interruption of the braking resistor switch 87
755 Checking the LEDs 88
756 Checking the voltages 89
Primary voltage 89
24 V control voltage for the charging contactor 90
DC-link voltage 91
Testing the UV/ UVR without connected units 92
Enabling connector 92
Figure: UV without connected units 93
Setup with test adapter 94
76 Error diagnosis on the UM power module 95
761 Inspection for ground fault 95
Fast line fuses 95
Load switching 95
Voltage balancing 95
Required measuring devices 95
Isolation voltage 95
Procedure 96
Figure: Ground fault measuring 96
Flowchart 97
Corrective action 98
Heavily contaminated inverters 98
762 Inspection for short circuit or interruption 99
Fast line fuses 99
Load switching 99
Required measuring devices 99
Diode measurement 99
Block diagram: IGBT end stage100
Procedure100
Figure: Diode measurement ± Uz100
Flowchart: Short circuit or interruption between +Uz and -Uz101
Figure: Diode measurement ± Uz on motor output102
Flowchart: Short circuit or interruption between ± Uz and motor output103
What cannot be measured?104
Corrective action104
Heavily contaminated inverters104
763 Checking the LEDs105
764 Checking the voltages107
DC-link voltage107
Setup with test adapter108
765 Interchanging power modules or output stages of the same type109
Assumed configuration for two 1-axis modules109
Assumed configuration for one 2-axis module110
Block diagram for two 1-axis modules110
Flowchart for two 1-axis modules111
766 Interchanging the PWM outputs112
77 Error diagnosis on the UE, UR compact inverter113
771 Inspection for ground fault113
Fast line fuses113
Load switching113
Potential dividers113
Required measuring devices113
Isolation voltage113
Procedure114
Figure: Ground fault measuring114
Flowchart115
Corrective action116
Heavily contaminated inverters116
772 Inspection for short circuit or interruption117
Fast line fuses117
Load switching117
Required measuring devices117
Diode measurement117
Block diagram: Non-controlled bridge rectifier118
Block diagram: Controlled bridge rectifier with IGBTs118
Block diagram: IGBT end stage118
Procedure119
Figure: Diode measurement ± Uz119
Flowchart: Short circuit or interruption between +Uz and -Uz120
Figure: Diode measurement ± Uz on motor output121
Flowchart: Short circuit or interruption between ± Uz and motor output122
What cannot be measured?123
Corrective action123
Heavily contaminated inverters123
773 Checking the fuses124
774 Checking the internal braking resistor125
Required measuring devices125
Block diagrams125
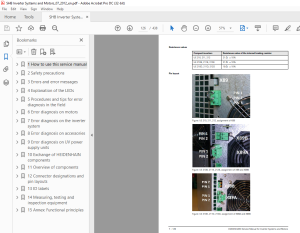
Resistance values126
Pin layout126
Procedure127
Figure: Measurement of internal braking resistor127
Flowchart Resistance value128
775 Checking the braking resistor switch129
Diode measurement129
Required measuring devices129
Block diagrams129
Procedure131
Figure: Measuring of braking resistor switch131
Flowchart: Short circuit or interruption of the braking resistor switch132
776 Checking the LEDs133
777 Checking the voltages136
Primary voltage136
24 V- control voltage for the charging contactor137
DC-link voltage138
Testing the UE, UR without connected units139
Enabling connector140
Figure: UR without connected units140
Setup with test adapter141
778 Interchanging output stages of the same type142
Assumed configuration142
Block diagram143
Flowchart144
779 Interchanging the PWM outputs145
78 Error diagnosis on the UEC controller unit with integrated inverter146
781 Inspection for ground fault146
Fast line fuses146
Potential dividers146
Required measuring devices146
Isolation voltage146
Procedure147
Figure: Ground fault measuring147
Flowchart148
Corrective action149
Heavily contaminated inverters149
782 Inspection for short circuit or interruption150
783 Checking the internal braking resistor150
Required measuring devices150
Block diagram150
Procedure151
Figure: Measurement of internal braking resistor151
Flowchart Resistance value152
784 Checking the braking resistor switch152
785 Checking the LEDs153
786 Checking the primary voltage155
787 Interchanging output stages of the same type155
79 Error diagnosis on the UMC controller unit with integrated inverter156
791 Inspection for ground fault156
Fast line fuses156
Required measuring devices156
Isolation voltage156
Procedure157
Figure: Ground fault measuring157
Flowchart158
Corrective action159
Heavily contaminated inverters159
792 Inspection for short circuit or interruption160
Fast line fuses160
Required measuring devices160
Diode measurement160
Block diagram: IGBT end stage160
Procedure161
Figure: Diode measurement ± Uz161
Flowchart: Short circuit or interruption between +Uz and -Uz162
Figure: Diode measurement ± Uz on motor output163
Flowchart: Short circuit or interruption between ± Uz and motor output164
What cannot be measured?165
Corrective action165
Heavily contaminated inverters165
793 Checking the LEDs166
794 Checking the voltages167
DC-link voltage167
24 V voltage168
795 Exchanging output stages of the same type168
710 Error diagnosis on non-HEIDENHAIN inverter systems169
7101 Inspection for ground fault169
Instruction of the manufacturer169
7102 Inspection for short circuit or interruption169
Instruction of the manufacturer169
7103 Checking the displays on the infeed/regenerative module of the non-HEIDENHAIN manufacturer169
7104 Checking the LEDs on the HEIDENHAIN expansion boards170
7105 Checking the voltages171
Primary voltage171
Control voltages for charging and enabling contactors171
DC-link voltage171
7106 Interchaning the HEIDENHAIN interface boards for the SIMODRIVE 611 system172
Boards of the same type172
Boards of different types172
7107 Interchanging power stages of the same type173
Instruction of the manufacturer173
Block diagram for two 1-axis modules173
Flowchart for two 1-axis modules174
7108 Interchange of the PWM outputs175
8 Error diagnosis on accessories177
81 Safety177
82 Possible causes of error177
83 Visual inspection177
84 Error diagnosis on the PW braking resistor178
841 Inspection for ground fault178
Fast line fuses178
Required measuring devices178
Isolation voltage178
Procedure179
Figure: Ground fault measuring with insulation tester179
Flowchart180
Corrective action181
Heavily contaminated braking resistors181
842 Checking the resistance value182
Flowchart182
Resistance values182
843 Checking the fan183
844 Checking the temperature switch183
85 Error diagnosis on the braking resistor module UP 1x0184
851 Inspection for ground fault184
Fast line fuses184
Potential dividers184
Required measuring devices184
Isolation voltage184
Procedure185
Flowchart185
Corrective action186
Heavily contaminated UPs186
852 Inspection for short circuit187
Fast line fuses187
Required measuring devices187
Procedure187
Flowchart: Short circuit in the UP 1x0188
Corrective action188
Heavily contaminated UPs188
853 Checking the resistance value189
Removing and opening the UP 1x0189
Checking the resistance value189
854 Checking the braking resistor switch190
Diode measurement190
Required measuring devices190
Block diagram190
Procedure190
Flowchart: Short circuit or interruption of the braking resistor switch191
Figure: Diode measurement192
855 Checking the temperature switch193
Procedure193
Removing and opening the UP 1x0193
Checking the temperature switch193
86 Error diagnosis on the SM voltage-protection module194
861 Inspection for short circuit194
Required measuring devices194
Diode measurement194
Block diagram: Rectified motor phases and thyristor194
Procedure194
Figure: Open SM195
Flowchart: Short circuit between plus pole and negative pole196
Flowchart: Short circuit of ± pole to motor line197
862 Checking the temperature switch198
9 Error diagnosis on UV power supply units199
91 Safety199
92 Possible causes of error199
93 Error diagnosis on UV 101 B200
Checking the supply voltages200
Protective PCB200
Checking the low voltages201
Fuses in the UV 101 B201
Corrective action202
94 Error diagnosis on the UV 102203
Checking the supply voltages203
Protective PCB203
Checking the low voltages204
Fuses in UV 102204
Corrective action204
95 Error diagnosis on the UV 105, UV 105 B205
Checking the LED READY UV205
5 V on auxiliary terminal205
Function of the fan205
Checking the supply voltages205
Protective PCB207
Checking the low voltages208
Fuses in the UV 105 (B)209
Corrective action210
96 Error diagnosis on the UV 106 B211
Checking the LED READY UV211
Function of the fan211
Checking the supply voltages211
Checking the low voltages211
Fuses in the UV 106 (B)211
Corrective action212
97 Error diagnosis on the UV 111A, UV 111B213
Checking the supply voltages213
Protective PCB213
Checking the low voltages214
Fuses in the UV 111x214
Corrective action214
10 Exchange of HEIDENHAIN components215
101 Important notes215
Which components can be exchanged in the field?215
What cannot be replaced?215
Electronic ID label216
ESD protection217
Information about possible errors219
ID number for service order219
Serial number for traceability219
Replacement units and spare parts219
Repair219
Packaging219
Checking after replacement of electrical components219
102 Replacement of the complete controller unit with integrated inverter220
Removing the defective controller unit220
Integrating the new controller unit220
Checking after replacement of electrical components220
Return shipment220
103 Exchanging the complete inverter221
1031 Inverter without water cooling221
Removing the defective inverter221
Integrating the new inverter221
Checking after replacement of electrical components221
Return shipment221
1032 Inverter with water cooling222
Removing the defective inverter222
Integrating the new inverter222
Checking after replacement of electrical components223
Return shipment223
104 Exchanging the complete motor224
1041 Motor without hollow shaft224
Removing the defective motor224
Integrating the new motor224
Checking after replacement of electrical components224
Testing the functions224
Return shipment224
1042 Motor with hollow shaft225
Removing the defective motor225
Integrating the new motor225
Checking after replacement of electrical components226
Testing the functions226
Return shipment226
105 Exchanging the motor encoder of the QAN asynchronous motor227
Introduction227
Mounting instructions227
Tools227
Removing the defective motor encoders228
Integrating the new motor encoder229
Checking after replacement of electrical components230
Return shipment230
106 Replacement of scanning head and scale drum of the hollow-shaft motor231
Introduction231
Coolant system231
Mounting instructions231
Tools231
1061 Replacement of the scanning head without signal cable232
Removing the defective scanning head232
Mounting the new scanning head237
Checking after replacement of electrical components237
Return shipment237
1062 Replacement of the scanning head with signal cable238
Removing the defective scanning head238
Mounting the new scanning head243
Checking after replacement of electrical components244
Return shipment244
1063 Replacing the scale drum245
Removing the defective scale drum245
Installing the new scale drum248
Checking after replacement of electrical components249
Return shipment249
107 Exchanging the signal socket of the motor250
Removing the defective signal socket250
Integrating the new signal socket251
Checking after replacement of electrical components251
108 Exchanging the fan of a spindle motor252
Removing the defective fan252
Mounting the new fan255
Checking after replacement of electrical components256
Testing the functions256
109 Exchanging the fan guard of the spindle motor257
Premounted spare part257
Removing the defective fan guard257
Mounting the new fan guard259
1010 Changing connections to the reserve temperature sensor260
1011 Exchanging inverter accessories261
General261
ZKF261
SM 130261
Checking after replacement of electrical components261
Return shipment261
1012 Exchanging cables and connectors262
Checking after replacement of electrical components262
1013 Exchanging power supply units263
10131 Exchanging the UV 101 B, UV 102, UV 111A, UV 111 B power supply unit263
Removing the defective power supply unit263
Integrating the new power supply unit263
Checking after replacement of electrical components263
Return shipment263
10132 Exchanging the UV 105 power supply unit264
Removing the defective power supply unit264
Integrating the new power supply unit264
Checking after replacement of electrical components264
Return shipment264
10133 Exchanging the UV 105 B power supply unit265
Removing the defective power supply unit265
Integrating the new power supply unit265
Checking after replacement of electrical components265
Return shipment265
10134 Exchanging the UV 106 B power supply unit266
Removing the defective power supply unit266
Integrating the new power supply unit266
Checking after replacement of electrical components266
Return shipment266
1014 Exchanging HEIDENHAIN interface boards in the SIMODRIVE system267
Version with D-sub connector267
Version with ribbon cable connector271
Compatibility of HEIDENHAIN expansion boards to SIMODRIVE power modules272
Checking after replacement of electrical components272
11 Overview of components273
111 Controller units with integrated inverter273
1111 Compilation273
1112 UEC 1xx controller units with integrated inverter274
1113 UMC 1xx controller unit with integrated inverter274
1114 Toroidal cores274
112 Compact inverters275
1121 Compilation275
1122 UE 1xx compact inverter276
1123 UE 2xx compact inverter276
1124 UE 2xxB compact inverter277
1125 UR 2xx (D) compact inverter277
1126 Toroidal cores278
1127 Ribbon cables and covers (only for UE 2xxB, UR 2xx(D))278
20-line ribbon cable278
40-line ribbon cable278
50-line ribbon cable278
Ribbon cable covers278
113 Modular inverters279
1131 Compilation279
1132 UV 130(D) power supply unit280
1133 UV(R) 1x0(D) power supply unit280
1134 UM 1xx(B)(D) power modules281
1135 Ribbon cables and covers281
20-line ribbon cable281
40-line ribbon cable281
50-line ribbon cable281
Ribbon cable covers281
114 Accessories for compact inverters and modular inverters282
1141 PW 21x, PW 110(B), PW 120 braking resistors282
1142 UP 110, UP 120 braking resistor module283
1143 Line filter284
Application example for the use of line filter, three-phase current capacitor and commutating reactor285
1144 Three-phase capacitor286
1145 KDR 1x0(B) commutating reactor287
1146 ZKF 1x0 DC-link filter288
Application example for the use of DC-link filter, braking resistor module, voltage protection module289
1147 SM 1xx voltage protection module290
1148 Adapter module291
Example for the application of the adapter module291
1149 Axis-enabling module292
Example for the application of the axis release module292
11410 Capacitor module293
115 HEIDENHAIN interface boards for the SIMODRIVE system294
1151 Compilation294
1152 Interface boards294
116 Power supply units295
1161 UV 101 B power supply unit295
Example for the application of the UV 101 B295
1162 UV 102 power supply unit296
Example for the application of the UV 102296
1163 UV 105 power supply unit297
1164 UV 105 B power supply unit297
Examples for the application of the UV 105 B298
1165 UV 106 B power supply unit299
1166 UV 111 A, UV 111 B power supply units299
117 HEIDENHAIN motors300
12 Connector designations and pin layouts301
121 Important note301
122 Controller units with integrated inverter301
1221 Designation and position of connections301
UEC 11x301
1222 Pin layouts on the UEC and UMC302
Type of terminals on the UxC 11x (FS)302
X4: Single-channel PLC inputs302
X5: Single-channel PLC inputs303
X104-Safety: Dual-channel PLC inputs304
X6: Single-channel PLC outputs305
X6 - safety: Single-channel PLC outputs306
X106-Safety: Single/dual- channel PLC outputs307
X15 to X20: 1 Vpp speed encoder308
X15 to X20: Speed encoder with EnDat interface309
X31: UEC power supply312
X71: Safety relay for spindle X72: Safety relay for axes313
X80: Spindle motor X81: Axis motor 1 X82: Axis motor 2 X83: Axis motor 3 X84: Axis motor 4313
X89: Braking resistor313
X90: 24 V output313
X112, X113: Triggering touch probes314
X201 to X206: Position encoder 1 Vpp315
X201 to X206: Position encoder with EnDat interface316
X344: 24 V power supply for motor holding brakes317
X394: Motor holding brakes317
X500, X502: HSCI interfaces317
123 Compact inverters318
1231 Designation and position of connections318
UE 110 / UE 112318
UE 210319
UE 212320
UE 230321
UE 240322
UE 242323
UE 210 B324
UE 211 B325
UE 212 B326
UE 230 B327
UE 240 B328
UE 242 B329
UR 230330
UR 230 D331
UR 240332
UR 240 D333
UR 242334
UR 242 D335
1232 Pin layout on the compact inverter336
X31: Supply voltage336
X32: Output for supply voltage of power supply unit337
X33: Supply voltage for the inverter supply unit337
X69: NC supply voltage and control signals338
X70: Main contactor X71: Safety relay for spindle X72: Safety relay for axes338
X74: Additional 5-V supply339
X79: Unit bus339
X80: Spindle motor X81: Axis motor 1 X82: Axis motor 2 X83: Axis motor 3 X84: Axis motor 4339
X89: Braking resistor340
X90: 24-V output, eg for the fan of an external braking resistor340
X110 to X114: PWM connection to control341
X344: 24-V supply for motor holding brake341
X392: Motor holding brake341
X393: Motor holding brake342
Maximum current for X392/X393342
X394: Motor holding brake342
Maximum current for X394342
124 Power supply units343
1241 Designation and position of connections343
UV 120343
UVR 120 D344
UV 130345
UV 130 D346
UVR 130 D347
UV 140348
UVR 140 D349
UV 150350
UVR 150351
UVR 150 D352
UVR 160 D353
UVR 160 DW354
1242 Pin layout on the power supply units355
X31: Supply voltage355
X69: NC supply voltage and control signals356
X70: Main contactor356
X71: Safety relay for spindle X72: Safety relay for axes356
X74: Additional 5-V supply357
X79: Unit bus357
X89: Braking resistor357
X90: 24-V output, eg for the fan of an external braking resistor357
125 Braking resistors and braking resistor modules358
1251 Designation and position of connections358
PW 21x358
PW 1x0 (B)359
UP 1x0359
1252 Pin layout of braking resistor or braking resistor module360
X89: Braking resistor360
Temperature switch361
X2: Fan for the external braking resistor PW 1x0(B)361
X79: Unit bus361
126 Power modules362
1261 Designation and position of connections362
UM 111362
UM 111 D363
UM 111 B364
UM 111 BD365
UM 112366
UM 112 D367
UM 113368
UM 113 D369
UM 114370
UM 114 D371
UM 115372
UM 115 D373
UM 116 D374
UM 116 DW375
UM 121376
UM 121 B377
UM 121 D378
UM 121 BD379
UM 122380
UM 122 D381
1262 Pin layout on the power modules382
X79: Unit bus382
X81: Axis/spindle motor X82: Axis/spindle motor382
X111, X112: PWM connection to the control382
X344: 24-V supply for motor holding brake382
X392: Motor holding brake383
127 DC-link filter384
1271 Designation and position of connections384
ZKF 130384
1272 Pin layout on the DC-link filter384
X79: Unit bus (only ZKF 130)384
UZ: DC-link voltage384
128 Adapter module385
1281 Designation and position of connections385
1282 Pin layout on the adapter module385
X69a: From the first power supply unit (diagnosable)385
X69b: From the second power supply unit (no diagnosis)386
X69: Ribbon cable to the control386
X75: Service connector386
129 HEIDENHAIN interface boards for the SIMODRIVE system387
1291 Designation and position of connections387
Interface boards Ribbon cable387
Expansion board 2-axis D-sub connector (galvanically isolated)387
1292 Pin layout on the expansion boards388
X73: Enabling connector388
X111, X112: PWM connection to the control388
X1, X2: PWM connection to the control389
1210 UV 101 B power supply unit390
12101 Designation and position of connections390
12102 Error diagnosis on UV 101 B391
X31: Supply voltage391
X69: NC supply voltage and control signals391
UZ: Power supply of the UV 101 B with UZ391
1211 UV 102 power supply unit392
12111 Designation and position of connections392
12112 Pin layouts on UV 102392
X31: Supply voltage392
1212 UV 105 power supply unit393
12121 Designation and position of connections393
12122 Pin layouts on UV 105394
X31: Supply voltage394
X69, X169: NC supply voltage and control signals394
X74: 5-V power supply394
UZ Power supply of the UV 105 with UZ394
1213 UV 105 B power supply unit395
12131 Designation and position of connections395
12132 Pin layouts on UV 105 B395
X31: Supply voltage395
X69: NC supply voltage and control signals396
X74: 5-V powersupply396
UZ: Power supply of the UV 105B with UZ396
1214 UV 106 B power supply unit397
12141 Designation and position of connections397
12142 Pin layouts on UV 106 B397
X31: Supply voltage for UV 106B397
Power connection398
1215 UV 111A, UV 111B power supply unit399
12151 Designation and position of connections399
12152 Pin layout on the UV 111A, UV 111B400
X31: Supply voltage400
X69: NC supply voltage and control signals,400
UZ: Power supply of the UV 111 with UZ400
X51 to X61: PWM interface400
13 ID labels401
131 ID label for inverters401
132 Electronic ID label for inverters404
Advantage for commissioning404
Advantage for the field service404
133 ID label for motors406
QSY synchronous motors406
QAN asynchronous motors406
134 Electronic ID label for motors407
Advantage for commissioning407
Advantage for the field service407
135 ID label for HEIDENHAIN expansion boards409
136 ID label for accessories409
14 Measuring, testing and inspection equipment411
141 Important notes411
142 Voltage tester412
143 Insulation tester412
144 Multimeter413
145 Current probe413
146 Test adapter414
Brief description414
Adapter cable to the test adapter415
147 PWM 9 encoder diagnostic kit418
Brief description418
Available functions419
148 Testing unit PWT 18420
Brief description420
Available functions420
149 IK 215 adjusting and testing package421
1410 PWM 20 encoder diagnostic kit422
15 Annex: Functional principles423
151 PWM signals423
Schematic display of the PWM creation423
Change of the motor speed424
Change of the motor torque425
152 HEIDENHAIN inverter systems426
Block diagram427
Charging and main contactor427
Bridge rectifier427
Infeed regenerative module427
Power supply unit427
Power modules428
Braking resistor (resistance module)428
Current measurement428
Potential divider428
Uz monitoring428
Triggering428
Safety relay428
EMC428
Accessories428
153 HEIDENHAIN motors429
1531 Introduction429
1532 Asynchronous motors430
1533 Synchronous motors431
Rotational speed431
Motor control431
1534 Linear motors432
1535 Torque motors432
S.M 6/3/2025
More products