$43
Volkswagen Polo 2018 Workshop Manual – PDF DOWNLOAD
Volkswagen Polo 2018 Workshop Manual – PDF DOWNLOAD
FILE DETAILS:
Volkswagen Polo 2018 Workshop Manual – PDF DOWNLOAD
Language : English
Pages : 9577
Downloadable : Yes
File Type : PDF
Size: 124 MB
IMAGES PREVIEW OF THE MANUAL:

DESCRIPTION:
Volkswagen Polo 2018 Workshop Manual – PDF DOWNLOAD
- The Volkswagen Polo 2018 Workshop Manual is a comprehensive guide to the maintenance and repair of the Volkswagen Polo, a popular compact car produced by the German automaker. This manual provides detailed instructions and procedures for performing routine maintenance, as well as more complex repair tasks, on the Volkswagen Polo.
- The Volkswagen Polo 2018 Workshop Manual covers the Volkswagen Polo models produced in 2018. It provides information on the mechanical components of the vehicle, including the engine, transmission, suspension, brakes, and much more. The manual also includes detailed procedures for performing routine maintenance tasks, such as oil changes, tire rotations, and brake inspections.
- In addition to providing information on routine maintenance and repair tasks, the Volkswagen Polo 2018 Workshop Manual also includes troubleshooting guides that can help technicians and DIY enthusiasts diagnose and resolve mechanical problems in the Volkswagen Polo. The manual provides step-by-step procedures for diagnosing problems with the mechanical components of the vehicle, and provides recommendations for repairs and maintenance tasks.
- The Volkswagen Polo 2018 Workshop Manual includes a wealth of technical information and diagrams that provide a clear understanding of the mechanical components of the Volkswagen Polo, making it easier for technicians and DIY enthusiasts to diagnose and resolve mechanical problems. The manual also includes a glossary of technical terms and a reference section that provides information on tools and equipment needed for maintenance and repair tasks.
- The Volkswagen Polo 2018 Workshop Manual is an essential resource for anyone working on the maintenance and repair of a Volkswagen Polo. Whether a professional technician or a DIY enthusiast, this manual provides the information and guidance needed to ensure that the mechanical components of the Volkswagen Polo are maintained and repaired correctly, and that mechanical problems are diagnosed and resolved quickly and efficiently.
TABLE OF CONTENTS:
Volkswagen Polo 2018 Workshop Manual – PDF DOWNLOAD
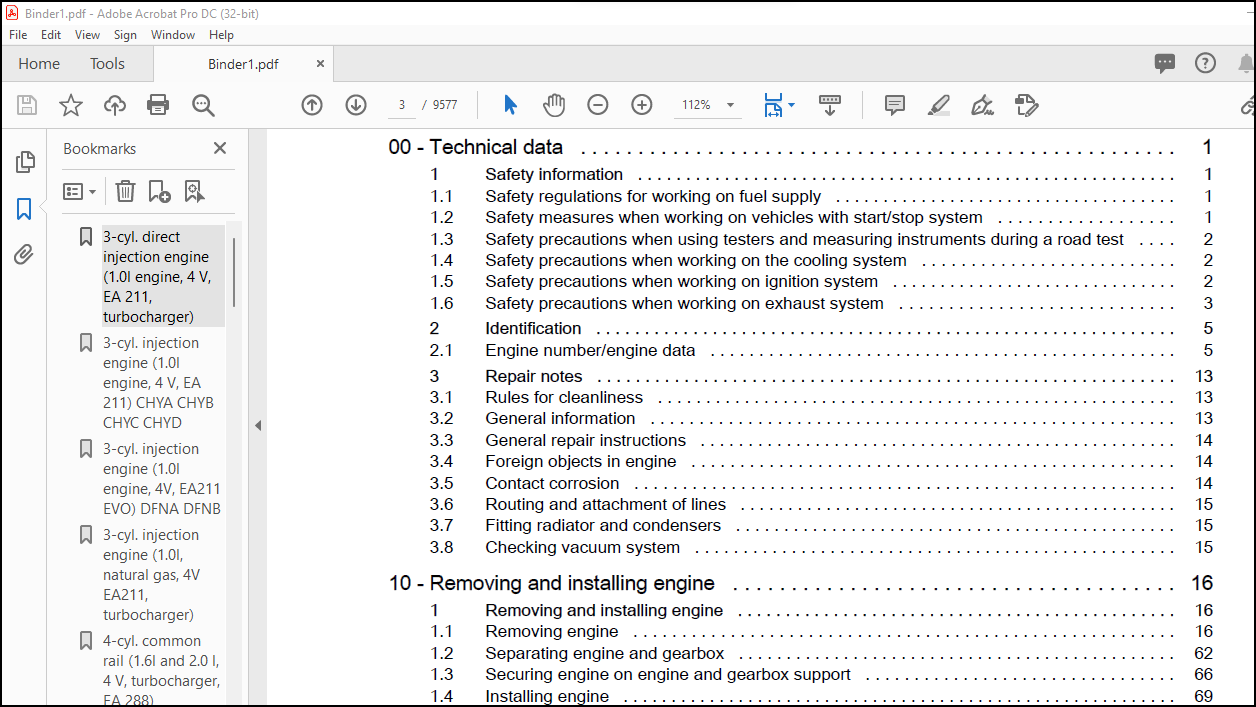
00 – Technical data . . . . . . . . . . . . . . . . . . . . . . . . . . . . . . . . . . . . . . . . . . . . . . . . . . . . 1
1 Safety information . . . . . . . . . . . . . . . . . . . . . . . . . . . . . . . . . . . . . . . . . . . . . . . . . . . . . . . . 1
1.1 Safety regulations for working on fuel supply . . . . . . . . . . . . . . . . . . . . . . . . . . . . . . . . . . . . 1
1.2 Safety measures when working on vehicles with start/stop system . . . . . . . . . . . . . . . . . . 1
1.3 Safety precautions when using testers and measuring instruments during a road test . . . . 2
1.4 Safety precautions when working on the cooling system . . . . . . . . . . . . . . . . . . . . . . . . . . 2
1.5 Safety precautions when working on ignition system . . . . . . . . . . . . . . . . . . . . . . . . . . . . . . 2
1.6 Safety precautions when working on exhaust system . . . . . . . . . . . . . . . . . . . . . . . . . . . . 3
2 Identification . . . . . . . . . . . . . . . . . . . . . . . . . . . . . . . . . . . . . . . . . . . . . . . . . . . . . . . . . . . . 5
2.1 Engine number/engine data . . . . . . . . . . . . . . . . . . . . . . . . . . . . . . . . . . . . . . . . . . . . . . . . 5
3 Repair notes . . . . . . . . . . . . . . . . . . . . . . . . . . . . . . . . . . . . . . . . . . . . . . . . . . . . . . . . . . . . 13
3.1 Rules for cleanliness . . . . . . . . . . . . . . . . . . . . . . . . . . . . . . . . . . . . . . . . . . . . . . . . . . . . . . 13
3.2 General information . . . . . . . . . . . . . . . . . . . . . . . . . . . . . . . . . . . . . . . . . . . . . . . . . . . . . . 13
3.3 General repair instructions . . . . . . . . . . . . . . . . . . . . . . . . . . . . . . . . . . . . . . . . . . . . . . . . . . 14
3.4 Foreign objects in engine . . . . . . . . . . . . . . . . . . . . . . . . . . . . . . . . . . . . . . . . . . . . . . . . . . 14
3.5 Contact corrosion . . . . . . . . . . . . . . . . . . . . . . . . . . . . . . . . . . . . . . . . . . . . . . . . . . . . . . . . 14
3.6 Routing and attachment of lines . . . . . . . . . . . . . . . . . . . . . . . . . . . . . . . . . . . . . . . . . . . . . . 15
3.7 Fitting radiator and condensers . . . . . . . . . . . . . . . . . . . . . . . . . . . . . . . . . . . . . . . . . . . . . . 15
3.8 Checking vacuum system . . . . . . . . . . . . . . . . . . . . . . . . . . . . . . . . . . . . . . . . . . . . . . . . . . 15
10 – Removing and installing engine . . . . . . . . . . . . . . . . . . . . . . . . . . . . . . . . . . . . . . 16
1 Removing and installing engine . . . . . . . . . . . . . . . . . . . . . . . . . . . . . . . . . . . . . . . . . . . . . . 16
1.1 Removing engine . . . . . . . . . . . . . . . . . . . . . . . . . . . . . . . . . . . . . . . . . . . . . . . . . . . . . . . . 16
1.2 Separating engine and gearbox . . . . . . . . . . . . . . . . . . . . . . . . . . . . . . . . . . . . . . . . . . . . . . 62
1.3 Securing engine on engine and gearbox support . . . . . . . . . . . . . . . . . . . . . . . . . . . . . . . . 66
1.4 Installing engine . . . . . . . . . . . . . . . . . . . . . . . . . . . . . . . . . . . . . . . . . . . . . . . . . . . . . . . . . . 69
2 Assembly mountings . . . . . . . . . . . . . . . . . . . . . . . . . . . . . . . . . . . . . . . . . . . . . . . . . . . . . . 81
2.1 Assembly overview – assembly mountings . . . . . . . . . . . . . . . . . . . . . . . . . . . . . . . . . . . . . . 81
2.2 Removing and installing engine mounting . . . . . . . . . . . . . . . . . . . . . . . . . . . . . . . . . . . . . . 90
2.3 Removing and installing gearbox mounting . . . . . . . . . . . . . . . . . . . . . . . . . . . . . . . . . . . . 93
2.4 Removing and installing pendulum support . . . . . . . . . . . . . . . . . . . . . . . . . . . . . . . . . . . . 96
2.5 Supporting engine in installation position . . . . . . . . . . . . . . . . . . . . . . . . . . . . . . . . . . . . . . 98
2.6 Adjusting assembly mountings . . . . . . . . . . . . . . . . . . . . . . . . . . . . . . . . . . . . . . . . . . . . . . 129
2.7 Checking adjustment of assembly mountings (engine and gearbox mountings) . . . . . . . . 131
13 – Crankshaft group . . . . . . . . . . . . . . . . . . . . . . . . . . . . . . . . . . . . . . . . . . . . . . . . . . 133
1 Cylinder block (pulley end) . . . . . . . . . . . . . . . . . . . . . . . . . . . . . . . . . . . . . . . . . . . . . . . . . . 133
1.1 Assembly overview – poly V-belt drive . . . . . . . . . . . . . . . . . . . . . . . . . . . . . . . . . . . . . . . . 133
1.2 Removing and installing poly-V belt . . . . . . . . . . . . . . . . . . . . . . . . . . . . . . . . . . . . . . . . . . 137
1.3 Removing and installing tensioner for poly V-belt . . . . . . . . . . . . . . . . . . . . . . . . . . . . . . . . 140
1.4 Removing and installing vibration damper . . . . . . . . . . . . . . . . . . . . . . . . . . . . . . . . . . . . . . 140
1.5 Removing and installing engine support . . . . . . . . . . . . . . . . . . . . . . . . . . . . . . . . . . . . . . 143
1.6 Renewing crankshaft oil seal – belt pulley end . . . . . . . . . . . . . . . . . . . . . . . . . . . . . . . . . . 146
2 Cylinder block, gearbox end . . . . . . . . . . . . . . . . . . . . . . . . . . . . . . . . . . . . . . . . . . . . . . . . 149
2.1 Assembly overview – cylinder block, gearbox end . . . . . . . . . . . . . . . . . . . . . . . . . . . . . . . . 149
2.2 Removing and installing flywheel . . . . . . . . . . . . . . . . . . . . . . . . . . . . . . . . . . . . . . . . . . . . 150
2.3 Removing and installing sealing flange on gearbox side . . . . . . . . . . . . . . . . . . . . . . . . . . 151
3 Crankshaft . . . . . . . . . . . . . . . . . . . . . . . . . . . . . . . . . . . . . . . . . . . . . . . . . . . . . . . . . . . . . . 159
3.1 Crankshaft dimensions . . . . . . . . . . . . . . . . . . . . . . . . . . . . . . . . . . . . . . . . . . . . . . . . . . . . 159
3.2 Renewing needle bearing in crankshaft . . . . . . . . . . . . . . . . . . . . . . . . . . . . . . . . . . . . . . . . 159
4 Pistons and conrods . . . . . . . . . . . . . . . . . . . . . . . . . . . . . . . . . . . . . . . . . . . . . . . . . . . . . . 162
4.1 Assembly overview – pistons and conrods . . . . . . . . . . . . . . . . . . . . . . . . . . . . . . . . . . . . . . 162
Golf 2013 ➤ , Golf 2017 ➤ , Golf Sportsvan 2015 ➤ , Golf Sportsvan 2018 …
3-cylinder direct injection engine (1.0-l engine, 4 V, EA 211, turbocharger) – Edition 02.2019
4.2 Removing and installing pistons . . . . . . . . . . . . . . . . . . . . . . . . . . . . . . . . . . . . . . . . . . . . . . 164
4.3 Checking pistons and cylinder bores . . . . . . . . . . . . . . . . . . . . . . . . . . . . . . . . . . . . . . . . . . 165
4.4 Separating new conrod . . . . . . . . . . . . . . . . . . . . . . . . . . . . . . . . . . . . . . . . . . . . . . . . . . . . 167
4.5 Checking radial clearance of conrods . . . . . . . . . . . . . . . . . . . . . . . . . . . . . . . . . . . . . . . . 167
4.6 Removing and installing oil spray jets . . . . . . . . . . . . . . . . . . . . . . . . . . . . . . . . . . . . . . . . 167
4.7 Setting piston to TDC position . . . . . . . . . . . . . . . . . . . . . . . . . . . . . . . . . . . . . . . . . . . . . . 168
15 – Cylinder head, valve gear . . . . . . . . . . . . . . . . . . . . . . . . . . . . . . . . . . . . . . . . . . 171
1 Cylinder head . . . . . . . . . . . . . . . . . . . . . . . . . . . . . . . . . . . . . . . . . . . . . . . . . . . . . . . . . . . . 171
1.1 Assembly overview – cylinder head . . . . . . . . . . . . . . . . . . . . . . . . . . . . . . . . . . . . . . . . . . 171
1.2 Assembly overview – camshaft housing . . . . . . . . . . . . . . . . . . . . . . . . . . . . . . . . . . . . . . . . 173
1.3 Removing and installing cylinder head . . . . . . . . . . . . . . . . . . . . . . . . . . . . . . . . . . . . . . . . 175
1.4 Removing and installing camshaft housing . . . . . . . . . . . . . . . . . . . . . . . . . . . . . . . . . . . . 178
1.5 Checking compression . . . . . . . . . . . . . . . . . . . . . . . . . . . . . . . . . . . . . . . . . . . . . . . . . . . . 181
2 Toothed belt drive . . . . . . . . . . . . . . . . . . . . . . . . . . . . . . . . . . . . . . . . . . . . . . . . . . . . . . . . 184
2.1 Assembly overview – toothed belt cover . . . . . . . . . . . . . . . . . . . . . . . . . . . . . . . . . . . . . . . . 184
2.2 Assembly overview – toothed belt . . . . . . . . . . . . . . . . . . . . . . . . . . . . . . . . . . . . . . . . . . . . 185
2.3 Removing and installing toothed belt . . . . . . . . . . . . . . . . . . . . . . . . . . . . . . . . . . . . . . . . . . 186
2.4 Preassembling and installing test tool VAS 611 007 . . . . . . . . . . . . . . . . . . . . . . . . . . . . . . 192
2.5 Checking valve timing . . . . . . . . . . . . . . . . . . . . . . . . . . . . . . . . . . . . . . . . . . . . . . . . . . . . 199
2.6 Adjusting valve timing . . . . . . . . . . . . . . . . . . . . . . . . . . . . . . . . . . . . . . . . . . . . . . . . . . . . . . 201
2.7 Removing toothed belt from camshaft . . . . . . . . . . . . . . . . . . . . . . . . . . . . . . . . . . . . . . . . 210
3 Valve gear . . . . . . . . . . . . . . . . . . . . . . . . . . . . . . . . . . . . . . . . . . . . . . . . . . . . . . . . . . . . . . 216
3.1 Assembly overview – valve gear . . . . . . . . . . . . . . . . . . . . . . . . . . . . . . . . . . . . . . . . . . . . . . 216
3.2 Measuring axial play of camshaft . . . . . . . . . . . . . . . . . . . . . . . . . . . . . . . . . . . . . . . . . . . . 217
3.3 Removing and installing camshaft oil seal . . . . . . . . . . . . . . . . . . . . . . . . . . . . . . . . . . . . . . 218
3.4 Removing and installing camshaft adjuster . . . . . . . . . . . . . . . . . . . . . . . . . . . . . . . . . . . . 223
3.5 Removing and installing camshaft control valve 1 N205 . . . . . . . . . . . . . . . . . . . . . . . . . . 231
3.6 Removing and installing exhaust camshaft control valve 1 N318 . . . . . . . . . . . . . . . . . . . . 233
3.7 Removing and installing valve stem seals . . . . . . . . . . . . . . . . . . . . . . . . . . . . . . . . . . . . . . 234
4 Inlet and exhaust valves . . . . . . . . . . . . . . . . . . . . . . . . . . . . . . . . . . . . . . . . . . . . . . . . . . . . 244
4.1 Checking valve guides . . . . . . . . . . . . . . . . . . . . . . . . . . . . . . . . . . . . . . . . . . . . . . . . . . . . 244
4.2 Checking valves . . . . . . . . . . . . . . . . . . . . . . . . . . . . . . . . . . . . . . . . . . . . . . . . . . . . . . . . . . 244
4.3 Valve dimensions . . . . . . . . . . . . . . . . . . . . . . . . . . . . . . . . . . . . . . . . . . . . . . . . . . . . . . . . 245
17 – Lubrication . . . . . . . . . . . . . . . . . . . . . . . . . . . . . . . . . . . . . . . . . . . . . . . . . . . . . . 246
1 Sump, oil pump . . . . . . . . . . . . . . . . . . . . . . . . . . . . . . . . . . . . . . . . . . . . . . . . . . . . . . . . . . 246
1.1 Assembly overview – sump/oil pump . . . . . . . . . . . . . . . . . . . . . . . . . . . . . . . . . . . . . . . . . . 246
1.2 Engine oil: . . . . . . . . . . . . . . . . . . . . . . . . . . . . . . . . . . . . . . . . . . . . . . . . . . . . . . . . . . . . . . 250
1.3 Removing and installing sump . . . . . . . . . . . . . . . . . . . . . . . . . . . . . . . . . . . . . . . . . . . . . . 250
1.4 Removing and installing oil pump . . . . . . . . . . . . . . . . . . . . . . . . . . . . . . . . . . . . . . . . . . . . 254
1.5 Removing and installing oil level and oil temperature sender G266 . . . . . . . . . . . . . . . . . . 256
2 Engine oil cooler . . . . . . . . . . . . . . . . . . . . . . . . . . . . . . . . . . . . . . . . . . . . . . . . . . . . . . . . . . 257
2.1 Assembly overview – engine oil cooler . . . . . . . . . . . . . . . . . . . . . . . . . . . . . . . . . . . . . . . . 257
2.2 Removing and installing engine oil cooler . . . . . . . . . . . . . . . . . . . . . . . . . . . . . . . . . . . . . . 258
3 Crankcase ventilation . . . . . . . . . . . . . . . . . . . . . . . . . . . . . . . . . . . . . . . . . . . . . . . . . . . . . . 259
3.1 Assembly overview – crankcase breather system . . . . . . . . . . . . . . . . . . . . . . . . . . . . . . . . 259
3.2 Removing and installing oil separator . . . . . . . . . . . . . . . . . . . . . . . . . . . . . . . . . . . . . . . . 260
4 Oil filter, oil pressure switch . . . . . . . . . . . . . . . . . . . . . . . . . . . . . . . . . . . . . . . . . . . . . . . . 263
4.1 Assembly overview – oil filter/oil pressure switch . . . . . . . . . . . . . . . . . . . . . . . . . . . . . . . . 263
4.2 Removing and installing oil pressure sender G10 . . . . . . . . . . . . . . . . . . . . . . . . . . . . . . . . 264
4.3 Checking oil pressure and oil pressure switch . . . . . . . . . . . . . . . . . . . . . . . . . . . . . . . . . . 265
4.4 Removing and installing oil filter housing . . . . . . . . . . . . . . . . . . . . . . . . . . . . . . . . . . . . . . 265
4.5 Removing and installing oil pressure regulating valve N428 . . . . . . . . . . . . . . . . . . . . . . . . 266
Golf 2013 ➤ , Golf 2017 ➤ , Golf Sportsvan 2015 ➤ , Golf Sportsvan 2018 …
3-cylinder direct injection engine (1.0-l engine, 4 V, EA 211, turbocharger) – Edition 02.2019
19 – Cooling . . . . . . . . . . . . . . . . . . . . . . . . . . . . . . . . . . . . . . . . . . . . . . . . . . . . . . . . . . 268
1 Cooling system/coolant . . . . . . . . . . . . . . . . . . . . . . . . . . . . . . . . . . . . . . . . . . . . . . . . . . . . 268
1.1 Connection diagram – coolant hoses . . . . . . . . . . . . . . . . . . . . . . . . . . . . . . . . . . . . . . . . . . 268
1.2 Checking cooling system for leaks . . . . . . . . . . . . . . . . . . . . . . . . . . . . . . . . . . . . . . . . . . . . 269
1.3 Draining and adding coolant . . . . . . . . . . . . . . . . . . . . . . . . . . . . . . . . . . . . . . . . . . . . . . . . 272
2 Coolant pump, regulation of cooling system . . . . . . . . . . . . . . . . . . . . . . . . . . . . . . . . . . . . 292
2.1 Assembly overview – coolant pump, thermostat . . . . . . . . . . . . . . . . . . . . . . . . . . . . . . . . . . 292
2.2 Assembly overview – electric coolant pump . . . . . . . . . . . . . . . . . . . . . . . . . . . . . . . . . . . . 294
2.3 Assembly overview – coolant temperature sender . . . . . . . . . . . . . . . . . . . . . . . . . . . . . . . . 296
2.4 Removing and installing electric coolant pump . . . . . . . . . . . . . . . . . . . . . . . . . . . . . . . . . . 297
2.5 Removing and installing coolant pump . . . . . . . . . . . . . . . . . . . . . . . . . . . . . . . . . . . . . . . . 300
2.6 Removing and installing thermostat . . . . . . . . . . . . . . . . . . . . . . . . . . . . . . . . . . . . . . . . . . 304
2.7 Removing and installing toothed belt pulley for coolant pump . . . . . . . . . . . . . . . . . . . . . . 307
2.8 Removing and installing coolant temperature sender G62 . . . . . . . . . . . . . . . . . . . . . . . . 307
2.9 Removing and installing radiator outlet coolant temperature sender G83 . . . . . . . . . . . . 310
3 Coolant pipes . . . . . . . . . . . . . . . . . . . . . . . . . . . . . . . . . . . . . . . . . . . . . . . . . . . . . . . . . . . . 315
3.1 Assembly overview – coolant pipes . . . . . . . . . . . . . . . . . . . . . . . . . . . . . . . . . . . . . . . . . . 315
3.2 Removing and installing coolant pipes . . . . . . . . . . . . . . . . . . . . . . . . . . . . . . . . . . . . . . . . 315
4 Radiator, radiator fan . . . . . . . . . . . . . . . . . . . . . . . . . . . . . . . . . . . . . . . . . . . . . . . . . . . . . . 317
4.1 Assembly overview – radiator/radiator fan . . . . . . . . . . . . . . . . . . . . . . . . . . . . . . . . . . . . . . 317
4.2 Assembly overview – radiator cowl and radiator fan . . . . . . . . . . . . . . . . . . . . . . . . . . . . . . 326
4.3 Assembly overview – radiator blind . . . . . . . . . . . . . . . . . . . . . . . . . . . . . . . . . . . . . . . . . . . . 329
4.4 Removing and installing radiator . . . . . . . . . . . . . . . . . . . . . . . . . . . . . . . . . . . . . . . . . . . . 331
4.5 Removing and installing water radiator for charge air cooling circuit . . . . . . . . . . . . . . . . . . 350
4.6 Removing and installing radiator cowl . . . . . . . . . . . . . . . . . . . . . . . . . . . . . . . . . . . . . . . . 354
4.7 Removing and installing radiator fan V7 . . . . . . . . . . . . . . . . . . . . . . . . . . . . . . . . . . . . . . 359
4.8 Removing and installing radiator blind . . . . . . . . . . . . . . . . . . . . . . . . . . . . . . . . . . . . . . . . 360
4.9 Removing and installing radiator blind control motor V544 . . . . . . . . . . . . . . . . . . . . . . . . 362
21 – Turbocharging/supercharging . . . . . . . . . . . . . . . . . . . . . . . . . . . . . . . . . . . . . . . . 366
1 Turbocharger . . . . . . . . . . . . . . . . . . . . . . . . . . . . . . . . . . . . . . . . . . . . . . . . . . . . . . . . . . . . 366
1.1 Assembly overview – turbocharger . . . . . . . . . . . . . . . . . . . . . . . . . . . . . . . . . . . . . . . . . . . . 366
1.2 Removing and installing turbocharger . . . . . . . . . . . . . . . . . . . . . . . . . . . . . . . . . . . . . . . . 368
1.3 Removing and installing charge pressure positioner V465 . . . . . . . . . . . . . . . . . . . . . . . . 374
1.4 Removing and installing connection for turbocharger . . . . . . . . . . . . . . . . . . . . . . . . . . . . 375
2 Charge air system . . . . . . . . . . . . . . . . . . . . . . . . . . . . . . . . . . . . . . . . . . . . . . . . . . . . . . . . 378
2.1 Assembly overview – charge air system . . . . . . . . . . . . . . . . . . . . . . . . . . . . . . . . . . . . . . . . 378
2.2 Removing and installing charge air cooler . . . . . . . . . . . . . . . . . . . . . . . . . . . . . . . . . . . . . . 380
2.3 Removing and installing charge pressure sender GX26 . . . . . . . . . . . . . . . . . . . . . . . . . . 383
2.4 Checking charge air system for leaks . . . . . . . . . . . . . . . . . . . . . . . . . . . . . . . . . . . . . . . . 383
2.5 Removing and installing air pipe . . . . . . . . . . . . . . . . . . . . . . . . . . . . . . . . . . . . . . . . . . . . 385
24 – Mixture preparation – injection . . . . . . . . . . . . . . . . . . . . . . . . . . . . . . . . . . . . . . . . 388
1 Injection system . . . . . . . . . . . . . . . . . . . . . . . . . . . . . . . . . . . . . . . . . . . . . . . . . . . . . . . . . . 388
1.1 Overview of fitting locations – injection system . . . . . . . . . . . . . . . . . . . . . . . . . . . . . . . . . . 388
2 Injectors . . . . . . . . . . . . . . . . . . . . . . . . . . . . . . . . . . . . . . . . . . . . . . . . . . . . . . . . . . . . . . . . 400
2.1 Assembly overview – fuel rail with injectors . . . . . . . . . . . . . . . . . . . . . . . . . . . . . . . . . . . . 400
2.2 Removing and installing fuel rail . . . . . . . . . . . . . . . . . . . . . . . . . . . . . . . . . . . . . . . . . . . . . . 402
2.3 Removing and installing injectors . . . . . . . . . . . . . . . . . . . . . . . . . . . . . . . . . . . . . . . . . . . . 403
2.4 Cleaning injectors . . . . . . . . . . . . . . . . . . . . . . . . . . . . . . . . . . . . . . . . . . . . . . . . . . . . . . . . 408
3 Air filter . . . . . . . . . . . . . . . . . . . . . . . . . . . . . . . . . . . . . . . . . . . . . . . . . . . . . . . . . . . . . . . . 410
3.1 Assembly overview – air filter housing . . . . . . . . . . . . . . . . . . . . . . . . . . . . . . . . . . . . . . . . 410
3.2 Removing and installing air filter housing . . . . . . . . . . . . . . . . . . . . . . . . . . . . . . . . . . . . . . 416
3.3 Removing air duct on lock carrier . . . . . . . . . . . . . . . . . . . . . . . . . . . . . . . . . . . . . . . . . . . . 419
Golf 2013 ➤ , Golf 2017 ➤ , Golf Sportsvan 2015 ➤ , Golf Sportsvan 2018 …
3-cylinder direct injection engine (1.0-l engine, 4 V, EA 211, turbocharger) – Edition 02.2019
4 Intake manifold . . . . . . . . . . . . . . . . . . . . . . . . . . . . . . . . . . . . . . . . . . . . . . . . . . . . . . . . . . 421
4.1 Assembly overview – intake manifold . . . . . . . . . . . . . . . . . . . . . . . . . . . . . . . . . . . . . . . . . . 421
4.2 Removing and installing intake manifold . . . . . . . . . . . . . . . . . . . . . . . . . . . . . . . . . . . . . . 422
4.3 Removing and installing throttle valve module GX3 . . . . . . . . . . . . . . . . . . . . . . . . . . . . . . 428
4.4 Cleaning throttle valve module GX3 . . . . . . . . . . . . . . . . . . . . . . . . . . . . . . . . . . . . . . . . . . 429
5 Senders and sensors . . . . . . . . . . . . . . . . . . . . . . . . . . . . . . . . . . . . . . . . . . . . . . . . . . . . . . 431
5.1 Assembly overview – actuator for structure-borne sound R214 and control unit for structureborne
sound J869 . . . . . . . . . . . . . . . . . . . . . . . . . . . . . . . . . . . . . . . . . . . . . . . . . . . . . . . . 431
5.2 Removing and installing fuel pressure sender G247 . . . . . . . . . . . . . . . . . . . . . . . . . . . . . . 432
5.3 Checking fuel pressure sender G247 . . . . . . . . . . . . . . . . . . . . . . . . . . . . . . . . . . . . . . . . 433
5.4 Removing and installing intake manifold sender GX9 . . . . . . . . . . . . . . . . . . . . . . . . . . . . 434
5.5 Removing and installing exhaust gas pressure sensor 1 G450 . . . . . . . . . . . . . . . . . . . . 435
6 Engine control unit . . . . . . . . . . . . . . . . . . . . . . . . . . . . . . . . . . . . . . . . . . . . . . . . . . . . . . . . 437
6.1 Assembly overview – engine control unit . . . . . . . . . . . . . . . . . . . . . . . . . . . . . . . . . . . . . . 437
6.2 Removing and installing engine (motor) control unit J623 . . . . . . . . . . . . . . . . . . . . . . . . 440
7 High-pressure pump . . . . . . . . . . . . . . . . . . . . . . . . . . . . . . . . . . . . . . . . . . . . . . . . . . . . . . 449
7.1 Assembly overview – high-pressure pump . . . . . . . . . . . . . . . . . . . . . . . . . . . . . . . . . . . . . . 449
7.2 Removing and installing high-pressure pump . . . . . . . . . . . . . . . . . . . . . . . . . . . . . . . . . . 450
7.3 Removing and installing high-pressure pipe . . . . . . . . . . . . . . . . . . . . . . . . . . . . . . . . . . . . 451
8 Lambda probe . . . . . . . . . . . . . . . . . . . . . . . . . . . . . . . . . . . . . . . . . . . . . . . . . . . . . . . . . . 453
8.1 Assembly overview – Lambda probe . . . . . . . . . . . . . . . . . . . . . . . . . . . . . . . . . . . . . . . . . . 453
8.2 Removing and installing Lambda probe . . . . . . . . . . . . . . . . . . . . . . . . . . . . . . . . . . . . . . . . 454
26 – Exhaust system . . . . . . . . . . . . . . . . . . . . . . . . . . . . . . . . . . . . . . . . . . . . . . . . . . 457
1 Exhaust pipes and silencers . . . . . . . . . . . . . . . . . . . . . . . . . . . . . . . . . . . . . . . . . . . . . . . . 457
1.1 Assembly overview – silencers . . . . . . . . . . . . . . . . . . . . . . . . . . . . . . . . . . . . . . . . . . . . . . 457
1.2 Separating exhaust pipes from silencers . . . . . . . . . . . . . . . . . . . . . . . . . . . . . . . . . . . . . . 465
1.3 Removing and installing silencer . . . . . . . . . . . . . . . . . . . . . . . . . . . . . . . . . . . . . . . . . . . . 469
1.4 Aligning exhaust system free of stress . . . . . . . . . . . . . . . . . . . . . . . . . . . . . . . . . . . . . . . . 478
1.5 Checking exhaust system for leaks . . . . . . . . . . . . . . . . . . . . . . . . . . . . . . . . . . . . . . . . . . 478
1.6 Installation position of clamp . . . . . . . . . . . . . . . . . . . . . . . . . . . . . . . . . . . . . . . . . . . . . . . . 479
2 Emission control . . . . . . . . . . . . . . . . . . . . . . . . . . . . . . . . . . . . . . . . . . . . . . . . . . . . . . . . . . 482
2.1 Assembly overview – emission control . . . . . . . . . . . . . . . . . . . . . . . . . . . . . . . . . . . . . . . . 482
2.2 Removing and installing catalytic converter . . . . . . . . . . . . . . . . . . . . . . . . . . . . . . . . . . . . 489
2.3 Removing and installing particulate filter . . . . . . . . . . . . . . . . . . . . . . . . . . . . . . . . . . . . . . 492
28 – Ignition system . . . . . . . . . . . . . . . . . . . . . . . . . . . . . . . . . . . . . . . . . . . . . . . . . . . . 493
1 Ignition system . . . . . . . . . . . . . . . . . . . . . . . . . . . . . . . . . . . . . . . . . . . . . . . . . . . . . . . . . . 493
1.1 Assembly overview – ignition system . . . . . . . . . . . . . . . . . . . . . . . . . . . . . . . . . . . . . . . . . . 493
1.2 Removing and installing ignition coils with output stage . . . . . . . . . . . . . . . . . . . . . . . . . . 494
1.3 Removing and installing knock sensor 1 G61 . . . . . . . . . . . . . . . . . . . . . . . . . . . . . . . . . . 497
1.4 Removing and installing Hall sender . . . . . . . . . . . . . . . . . . . . . . . . . . . . . . . . . . . . . . . . . . 498
1.5 Removing and installing engine speed sender G28 . . . . . . . . . . . . . . . . . . . . . . . . . . . . . . 499
More products