$40
Yamaha Tenere XT660Z 2008 Service Manual - PDF DOWNLOAD
Yamaha Tenere XT660Z 2008 Service Manual - PDF DOWNLOAD
FILE DETAILS:
Yamaha Tenere XT660Z 2008 Service Manual - PDF DOWNLOAD
Language : English
Pages : 399
Downloadable : Yes
File Type : PDF
IMAGES PREVIEW OF THE MANUAL:


TABLE OF CONTENTS:
Yamaha Tenere XT660Z 2008 Service Manual - PDF DOWNLOAD
TABLE OF CONTENTS 6
GENERAL INFORMATION 7
IDENTIFICATION 9
FEATURES 10
IMPORTANT INFORMATION 15
CHECKING THE CONNECTIONS 17
SPECIAL TOOLS 18
SPECIFICATIONS 23
GENERAL SPECIFICATIONS 25
ENGINE SPECIFICATIONS 26
CHASSIS SPECIFICATIONS 34
ELECTRICAL SPECIFICATIONS 37
TIGHTENING TORQUES 40
LUBRICATION POINTS AND LUBRICANT TYPES 49
COOLING SYSTEM DIAGRAMS 52
LUBRICATION CHART 56
LUBRICATION DIAGRAMS 57
CABLE ROUTING 65
PERIODIC CHECKS AND ADJUSTEMENTS 85
PERIODIC MAINTENANCE 87
ENGINE 89
CHASSIS104
ELECTRICAL SYSTEM116
CHASSIS119
GENERAL CHASSIS121
FRONT WHEEL127
REAR WHEEL134
FRONT BRAKE140
REAR BRAKE152
HANDLEBAR163
FRONT FORK168
STEERING HEAD177
REAR SHOCK ABSORBER ASSEMBLY181
SWINGARM184
CHAIN DRIVE189
ENGINE193
ENGINE REMOVAL195
CYLINDER HEAD202
ROCKER ARMS AND CAMSHAFT208
VALVES AND VALVE SPRINGS213
CYLINDER AND PISTON220
CLUTCH226
OIL PUMP234
BALANCER DRIVEN GEAR239
SHIFT SHAFT242
STARTER CLUTCH AND AC MAGNETO245
ELECTRIC STARTER250
CRANKCASE254
CRANKSHAFT260
TRANSMISSION263
COOLING SYSTEM269
RADIATOR271
THERMOSTAT274
WATER PUMP277
FUEL INJECTION SYSTEM283
FUEL TANK285
THROTTLE BODY ASSEMBLY288
AIR INDUCTION SYSTEM295
FUEL INJECTION SYSTEM300
ELECTRICAL SYSTEM325
IGNITION SYSTEM327
ELECTRIC STARTING SYSTEM331
CHARGING SYSTEM337
LIGHTING SYSTEM341
SIGNALING SYSTEM345
COOLING SYSTEM351
IMMOBILIZER SYSTEM355
ELECTRICAL COMPONENTS365
TROUBLESHOOTING389
WIRING DIAGRAM399
RETURN 1
DESCRIPTION:
Yamaha Tenere XT660Z 2008 Service Manual - PDF DOWNLOAD
HOW TO USE THIS MANUAL:
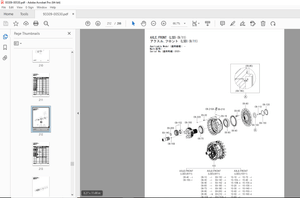
This manual is intended as a handy, easy-to-read reference book for the mechanic. Comprehensive explanations of all installation, removal, disassembly, assembly, repair and check procedures are laid out with the individual steps in sequential order.• The manual is divided into chapters and each chapter is divided into sections. The current section title "1" is shown at the top of each page.• Sub-section titles "2" appear in smaller print than the section title.• To help identify parts and clarify procedure steps, there are exploded diagrams "3" at the start of each removal and disassembly section.• Numbers "4" are given in the order of the jobs in the exploded diagram. A number indicates a dis- assembly step.• Symbols "5" indicate parts to be lubricated or replaced. Refer to "SYMBOLS". • A job instruction chart "6" accompanies the exploded diagram, providing the order of jobs, names of parts, notes in jobs, etc. · • Jobs "7" requiring more information (such as special tools and technical data) are described sequentially.
G.B 14/03/25
More products